







Systems Covered
-
Engine & Transmission: Full specifications, removal, installation, and service procedures.
-
Brakes & Suspension: Hydraulic, mechanical, and electronic system repair instructions.
-
HVAC & Interior: Climate control, seat systems, and cabin electronics.
-
Electrical & Electronics: Wiring diagrams, ECU locations, and fault diagnosis.
-
Diagnostics & Maintenance: Troubleshooting guides, inspection schedules, and safety procedures.
Highlights
-
Step-by-step repair instructions
-
Complete wiring and schematic diagrams
-
RHD and LHD configurations
-
Clear illustrations and exploded views
📦 Delivery Format
-
Structured HTML-based manual hierarchy
-
Instant digital access for desktop or offline archival
👤 Ideal For
-
Independent workshops, dealership-level technicians, diagnostic engineers, and ECU tuners who require pin-accurate wiring, ECU-level diagnostics, and HV-safe service workflows.
- Overview
- Drawing Description
- Terms and Abbreviations
- Common Electrical Symbols
- Common Connector Disconnection Methods
- Common Connector Clamping Structures
- Circuit Testing
- Detailed update History
- Distribution and Description of Distribution Box
- Front Compartment Distribution Box
- Fuse
- Relay
- Instrument Distribution Box
- Fuse
- Power Supply - Circuit Diagram
- Power Supply of Front Compartment Distribution Box - Circuit Diagram
- Power Supply of Instrument Distribution Box - Circuit Diagram
- Ground Point - Circuit Diagram
- Front Compartment Wiring Harness Ground Point - Circuit Diagram
- Instrument Wiring Harness,Ceiling Wiring Harness and Door Wiring Harness Ground Point - Circuit Diagram
- Ground Points of Floor Wiring Harness - Circuit Diagram
- Wiring Harness Layout Diagram
- Front compartment wiring harness
- Instrument panel wiring harness
- Floor wiring harness
- Left Front Door Wiring Harness
- Right Front Door Wiring Harness
- Left Rear Door Wiring Harness
- Right Rear Door Wiring Harness
- Tailgate Wiring Harness
- High voltage wiring harness
- Ceiling Wiring Harness
- Rear Bumper Wiring Harness
- Front Bumper Wiring Harness
- Trailer Hitch Wire
- System circuit diagram
- Trailer Hitch System - Circuit Diagram
- Integrated Intelligent Control System - Circuit Diagram (European Standard 11 kW)
- Integrated Intelligent Control System - Circuit Diagram (European Standard 7 KW)
- Integrated Intelligent Control System - Circuit Diagram (Japanese Standard)
- Integrated Intelligent Control System - Circuit Diagram (Chinese Standard)
- High Voltage - Circuit Diagram
- Shift Control - Circuit Diagram
- Electronic Power Steering System (TWR)
- Electronic Power Steering System (YB)
- Intelligent Power Brake System - Circuit Diagram
- Electronic Parking Brake System - Circuit Diagram (independent)
- Electronic Parking Brake System - Circuit Diagram (integrated)
- Reverse Radar - Circuit Diagram
- ETC and Anti-dazzle Inside Rearview Mirror - Circuit Diagram
- ACC and Multifunction Video Monitoring - Circuit Diagram
- Blind Area Detection System - Circuit Diagram
- Emergency Rescue System - Circuit Diagram
- Smart Key System - Circuit Diagram
- Door Lock Motor, Front Compartment Cover, Charging Port Cover - Circuit Diagram (! ETS)
- Door Lock Motor, Front Compartment Cover, Charging Port Cover - Circuit Diagram (ETS)
- Interior Light - Circuit Diagram
- Backlight - Circuit Diagram
- Window Regulator System - Circuit Diagram
- Ambient Light - Circuit Diagram (for Monochrome handle model)
- Ambient Light - Circuit Diagram (for Multicolor handle model)
- Low Beam / High Beam - Circuit Diagram
- Turn Signal / Warning Light - Circuit Diagram
- Position Light and Daytime Light- Circuit Diagram
- Brake Light - Circuit Diagram
- Reversing Light and Fog Light - Circuit Diagram
- Instrument Panel Cluster - Circuit Diagram
- Horn - Circuit Diagram
- Multimedia System - Circuit Diagram (for without amplifier model)
- Multimedia System - Circuit Diagram (for power amplifier model)
- OBD Interface - Circuit Diagram
- Body Network - Circuit Diagram
- Chassis Network - Circuit Diagram
- Energy Network - Circuit Diagram
- Smart Access Network - Circuit Diagram
- Air Conditioning System - Circuit Diagram
- Power Tailgate - Circuit Diagram
- Airbag System - Circuit Diagram
- Seat Belt Warning - Circuit Diagram
- Sunroof - Circuit Diagram
- USB Charging, Backup Power and Wireless Charging - Circuit Diagram
- Wiper System - Circuit Diagram
- Power Driver Seat Circuit Diagram
- Front Passenger Seat - Circuit Diagram
- Outside Rearview Memory Adjustment - Circuit Diagram
- Outside Rearview Mirror and Rear Windshield Heating - Circuit Diagram
- Overview
- General Service Information
- Diagnosis and Maintenance Method
- Diagnosis Information
- Fault Diagnosis and Troubleshooting
- Simulation Test for Circuit
- Precautions for Checking Control Module and Electrical Parts
- How to Check the Connector
- Maintenance Instructions
- Operating Tips
- Eliminating Circuit Faults
- Working Procedure
- Inspection and Maintenance of Fuse
- How to Handle Intermittent Faults
- How to Handle Historical Fault
- Noise, Vibration and Harshness (NVH)
- Description and Operation
- Diagnosis and Test
- Power
- High Voltage System
- Power Battery
- Diagnosis Description
- Basic Troubleshooting Process
- DTC Diagnosis Of Battery Execution and Sampling Unit
- P1A0000 Serious Electric Leakage
- P1A0100 General Electric Leakage
- P1A4100 Main Contactor Sintered
- P1A4200 Negative Contactor Sintered
- P1AC400 Serious Imbalance at Battery
- U029787 Communication with On-board Charger Failed
- U029800 Communication Between Battery Management System and DC Failed
- U012187 Communication with ABS Failed
- P1A0C00 BIC1 Voltage Sampling Abnormal
- P1A0D00 BIC2 Voltage Sampling Abnormal
- P1A0E00 BIC3 Voltage Sampling Abnormal
- P1A0F00 BIC4 Voltage Sampling Abnormal
- P1A1000 BIC5 Voltage Sampling Abnormal
- P1A1100 BIC6 Voltage Sampling Abnormal
- P1A1200 BIC7 Voltage Sampling Abnormal
- P1A1300 BIC8 Voltage Sampling Abnormal
- P1A0200 BIC1 Working Abnormal
- P1A0300 BIC2 Working Abnormal
- P1A0400 BIC3 Working Abnormal
- P1A0500 BIC4 Working Abnormal
- P1A0600 BIC5 Working Abnormal
- P1A0700 BIC6 Working Abnormal
- P1A0800 BIC7 Working Abnormal
- P1A0900 BIC8 Working Abnormal
- U20B000 BIC1 CAN Communication Timeout
- U20B100 BIC2 CAN Communication Timeout
- U20B200 BIC3 CAN Communication Timeout
- U20B300 BIC4 CAN Communication Timeout
- U20B400 BIC5 CAN Communication Timeout
- U20B500 BIC6 CAN Communication Timeout
- U20B600 BIC7 CAN Communication Timeout
- U20B700 BIC8 CAN Communication Timeout
- P2B7200 Temperature Sampling Disconnected (General Fault)
- P2B7300 Temperature Sampling Disconnected (Serious Fault)
- P2B7100 Voltage Sampling Disconnected (Serious Fault)
- P2B9213 High Voltage Side Drive Open-circuited
- P2B9298 High Voltage Side Drive Overtemperature
- P1A2000 BIC1 Temperature Sampling Abnormal
- P1A2100 BIC2 Temperature Sampling Abnormal
- P1A2200 BIC3 Temperature Sampling Abnormal
- P1A2300 BIC4 Temperature Sampling Abnormal
- P1A2400 BIC5 Temperature Sampling Abnormal
- P1A2500 BIC6 Temperature Sampling Abnormal
- P1A2600 BIC7 Temperature Sampling Abnormal
- P1A2700 BIC8 Temperature Sampling Abnormal
- U018087 Communication with High Voltage Side Drive Lost
- P2B9211 High Voltage Side Shorted to Ground SC (Contactor Channel)
- P2B9000 High Voltage Side Drive Overcurrent (Contactor Channel)
- P2B9212 High Voltage Side Shorted to Power OS (Contactor Channel)
- P2B8F12 High Voltage Side Drive Overvoltage OV
- P2B8E00 High Voltage Side Drive Undervoltage UV
- U027E01 BIC1 Cascade Communication Fault
- U027E02 BIC2 Cascade Communication Fault
- U027E03 BIC3 Cascade Communication Fault
- U027E04 BIC4 Cascade Communication Fault
- U027E05 BIC5 Cascade Communication Fault
- U027E06 BIC6 Cascade Communication Fault
- U027E07 BIC7 Cascade Communication Fault
- U027E08 BIC8 Cascade Communication Fault
- P2B7000 Voltage Sampling Disconnected (General Fault)
- P2B9219 High Voltage Side Drive Overcurrent (HVSU Channel)
- U016400 Communication with Air Conditioner Failed
- P1ADE00 Battery Cooling Failed Due to Air Conditioning System Fault
- P1ADF00 Internal Battery Circulation Failed Due to Air Conditioning System Fault
- P1AE000 Battery Heating Failed Due to Air Conditioning System Fault
- P1A5B00 Contactor Disconnected Due to Dual-circuit Power Fault
- P1A5600 12V Power Input of Battery Management System Too Low
- U110287 Communication with BCM Failed
- U02A200 Communication with Active Release Module Failed
- P1AF800 Battery Data Not Updated
- P2B7516 Power Battery Pack Undervoltage
- P1AE400 High Voltage Process Ended Due to Abnormal Low Voltage Supply
- P2B7C00 Shunt Temperature Seriously High
- P2B7900 Battery Pack Charging Overcurrent Alarm
- P1AF200 Voltage Output at DC Charger Abnormal
- P1AF300 DC Charging Cabinet Stopping Charging Actively
- P1AF400 Insufficient Capacity of DC Charging Cabinet
- P2B8A00 BIC Configuration Inconsistent with Module State
- U011000 Communication with Motor Control Unit Failed
- P2B7B00 Shunt Temperature Generally High
- P2B7E00 Large Deviation of Current Sampling at Shunt
- P2B7D00 Temperature Sampling Fault at Shunt
- P1A3522 Seriously High Voltage of Power Battery Cell
- P1A3622 Generally High Voltage of Power Battery Cell
- P1A3721 Seriously Low Voltage of Power Battery Cell
- P1A3922 Temperature of Power Battery Cell Seriously High
- P1A3B21 Temperature of Power Battery Cell Seriously Low
- P1A3E00 Main Contactor Echo Check Fault
- P1A3F00 Pre-charging Contactor Echo Check Fault
- P1A3D00 Negative Contactor Echo Check Fault
- P2B7400 Power Battery Overcharge
- P2B7517 Power Battery Pack Overvoltage
- P2B8000 HVSU_PACK + Voltage Sampling Fault
- P2B8100 HVSU_LINK + Voltage Sampling Fault
- P2B8200 HVSU_LINK - Voltage Sampling Fault
- P2B8A00 Power of HVSU Abnormal
- P2B9400 Power Battery Overdischarged
- P2B9200 Abnormal Battery Temperature Difference
- P1D7E00 Coolant Pump Stalling or Shut Down Due to Overcurrent
- P1ADC00 Front Electric High-voltage Interlocking Fault
- P2BA300 Power Battery Not Equalized at Bottom
- High Voltage Electronic Control System
- Diagnosis Description
- Basic Troubleshooting Process
- Diagnosis DTC of vehicle control unit
- P1D7902 Collision Alarm
- B17A300 SRS CAN Signal Abnormal
- B17A400 SRS Hardwire Signal Abnormal
- P1D6D00 DSP Reset Fault of Vehicle Control Unit
- P268700 Power Relay Echo Check Fault
- P1D8F00 Infinity Fan Power Overvoltage or Undervoltage
- P1D8D00 Infinity Fan Motor Stalling, Short-circuited, Etc.
- P1D8E00 Infinity Fan Overtemperature Protection, Electronic Error, Etc.
- U019780 Communication With Intelligent Power Brake Control Module Failed
- U012187 Communication with ABS Failed
- U024E87 Communication with ESC Failed
- U016487 Communication with Air Conditioner Failed
- U029F87 Communication with OBC Failed
- U011187 Communication with Battery Management System (BMS) Failed
- U014087 Communication with BCM Failed
- U029887 Communication with DC Failed
- U01A500 Communication with Front Motor Motor Control Unit (FMCU) Failed
- P1D9216 Total Voltage of Power Battery Seriously Low
- P1D9308 Life Frame of Power Battery Abnormal
- P1D9200 Total Voltage of Power Battery Too Low
- P1D9016 Voltage of Power Battery Cell Too Low
- P1D9100 Total Voltage of Power Battery Too High
- P1D9600 Life Frame of Power Battery Abnormal - Counter Out of Order
- P1D9017 Voltage of Power Battery Cell Too High
- P1D9117 Total Voltage of Power Battery Seriously High
- P1D9700 Life Frame of Power Battery Abnormal - Check Value Abnormal
- P268D00 Connection Signal of AC Charger Inconsistent
- P268973 DC Charging Negative Contactor Sintered
- P268B00 DC Charging Negative Contactor Echo Check Fault
- P268C00 Voltage of DC Charging Port Abnormal
- P268A00 DC Charging Positive Contactor Echo Check Fault
- P268873 DC Charging Positive Contactor Sintering
- U029887 Communication with DC Failed
- U014B87 Communication with DC Charging Cabinet Failed
- P26834B Temperature Rise of Charging Port Generally High (China Standard)
- P26834B Temperature Rise of Charging Port Generally High (European Standard, 7kW)
- P26834B Temperature Rise of Charging Port Generally High (European Standard, 11kW)
- P26834B Temperature Rise of Charging Port Generally High (Japanese Standard)
- P26804B Temperature Rise of Charging Port Generally High 1 (China Standard)
- P26804B Temperature Rise of Charging Port Generally High 1 (European Standard, 7kW)
- P26804B Temperature of Charging Port 1 Generally High (European Standard, 11kW)
- P26804B Temperature of Charging Port 1 Generally High (Japanese Standard)
- P26814B Temperature Rise of Charging Port Generally High 2 (China Standard)
- P26814B Temperature Rise of Charging Port Generally High 2 (European Standard, 7kW)
- P26814B Temperature of Charging Port 2 Generally High (European Standard, 11kW)
- P26814B Temperature of Charging Port 2 Generally High (Japanese Standard)
- P26844B Temperature Rise of Charging Port Seriously High (China Standard)
- P26844B Temperature Rise of Charging Port Seriously High (European Standard, 7kW)
- P26844B Temperature Rise of Charging Port Seriously High (European Standard, 11kW)
- P26844B Temperature Rise of Charging Port Seriously High (Japanese Standard)
- P26824B Temperature Rise of Charging Port Seriously High (China Standard)
- P26824B Temperature Rise of Charging Port Seriously High 3 (European Standard, 7kW)
- P26824B Temperature of Charging Port Seriously High 3 (European Standard, 11kW)
- P26824B Temperature of Charging Port Seriously High 3 (Japanese Standard)
- P1D9516 Supply Voltage on the Low Voltage Side Too Low
- P1B2517 Supply Voltage on the Low Voltage Side Too High
- P1D9400 Low Voltage Output Disconnected
- B116212 Water Temperature Sensor Short-circuited
- B116214 Water Temperature Sensor Getting Broken Circuit
- P1D9B00 Water Temperature Sensor Fault
- P1D9C00 Water Overtemperature
- P1BA000 Cruise Configuration Unwritten
- P1D6200 Cruise Switch Signal Fault
- P1D7B00 Accelerator Pedal Signal Fault-1 Signal Fault
- P1D7C00 Accelerator Pedal Signal Fault-2 Signal Fault
- P1D6600 Accelerator Pedal Signal Fault-Check Fault
- P268E00 Voltage Output at DC Charger Abnormal
- P1D8400 Water Temperature Fault (OBC)
- P1D6144 EEPROM Error of Vehicle Control Unit
- P1B1F00 Anti-theft Authentication Failed
- U024C87 Communication with I-KEY Failed
- U014E87 Communication with Security Gateway Module Failed
- P268600 High Voltage Interlock Fault
- P1D8300 Limited Power of Vehicle
- U029187 Communication with Gear Control Module Failed
- DTC of DC DC
- P1EC000 Voltage on the High Voltage Side Too High During Step-down
- P1EC100 Voltage on the High Voltage Side Too Low During Step-down
- P1EC600 Current on the High Voltage Side Too High During Step-down
- P1EC200 Voltage on the Low Voltage Side Too High During Step-down
- P1EC300 Voltage on the Low Voltage Side Too Low During Step-down
- P1EC400 Current on the Low Voltage Side Too High During Step-down
- P1EC700 Hardware Fault During Step-down
- P1EE000 DC Overtemperature
- P1ED317 Supply Voltage on the Low Voltage Side Too Low
- P1ED316 Supply Voltage on the Low Voltage Side Too High
- P1ED400 DC Output Positive Disconnected
- U029F87 Communication with OBC Failed
- DTC Diagnosis of OBC
- P157016 Voltage Low on the AC Side
- P157017 Voltage High on the AC Side
- P157219 Overcurrent on the DC Side
- P157216 Voltage Low on the DC Side
- P157217 Voltage High on the DC Side
- P157400 Power Equipment Fault
- P157897 CC Signal Abnormal
- P15794B Temperature Sampling 1 High
- P15834B Temperature Sampling 2 High
- P15FD00 High Temperature of Cooling Water
- P157A37 High Frequency of Charging Grid
- P157A36 Low Frequency of Charging Grid
- P157B00 Overcurrent on the AC Side
- P157C00 Hardware Protection
- P157E11 Outer of Charging Connection Signal Shorted to Ground (China Standard)
- P157E11 Outer of Charging Connection Signal Shorted to Ground (European Standard, 7kW)
- P157E11 Outer of Charging Connection Signal Shorted to Ground (European Standard, 11kW)
- P157E11 Outer of Charging Connection Signal Shorted to Ground (Japanese standard)
- P157E12 Outer of Charging Connection Signal Shorted to Power (China Standard)
- P157E12 Outer of Charging Connection Signal Shorted to Power (European Standard, 7kW)
- P157E12 Outer of Charging Connection Signal Shorted to Power (European Standard, 11kW)
- P157E12 Outer of Charging Connection Signal Shorted to Power (Japanese standard)
- P157F11 AC Output Short-circuited
- P158798 Phase Temperature of Charging Port Seriously High
- P158900 Phase Temperature Sampling of Charging Port Abnormal (China Standard)
- P158900 Phase Temperature Sampling of Charging Port Abnormal (European Standard, 7kW)
- P158900 Phase Temperature Sampling of Charging Port Abnormal (European Standard, 11kW)
- P158900 Phase Temperature Sampling of Charging Port Abnormal (Japanese Standard)
- P158A00 Electric Lock Abnormal (China Standard)
- P158A00 Electric Lock Abnormal (European Standard, 7kW)
- P158A00 Electric Lock Abnormal (European Standard, 11kW)
- P158A00 Electric Lock Abnormal (Japanese Standard)
- P151100 AC High Voltage Interlock Fault
- U011100 BMC Communication Timeout
- U015500 Communication Timeout at Instrument Panel Cluster
- U024500 Communication Timeout at Multimedia
- P151500 Water Temperature Sensor Fault
- U014087 BCM Communication Timeout
- U011181 Message Data of BMC Abnormal
- U015587 Message Data of Instrument Panel Cluster Abnormal
- U014081 Message Data of BCM Abnormal
- U011182 Cycle Counter of BMC Abnormal
- P15FF00 Internal Temperature Sensor Fault
- P1ED500 AC Electric Leakage
- U024582 Message Data of Multimedia Abnormal
- U029887 Communication with DC Failed
- DCT of Front Motor Control Module
- P1BB000 Front Drive Motor Overcurrent
- P1BB200 General Overtemperature Warning for Front Drive Motor
- P1BB298 Serious Overtemperature Warning for Front Drive Motor
- P1BF200 Winding Temperature Sensor Sampling at Front Drive Motor Abnormal
- P1BB300 IGBT-NTC General Overtemperature Warning for Front Drive Motor Control Module
- P1BB319 IGBT-NTC Serious Overtemperature Warning for Front Drive Motor Control Module (Chopper OFF)
- P1BAC00 IGBT Core General Overtemperature Warning for Front Drive Motor Control Module
- P1BAC19 IGBT Core Serious Overtemperature Warning for Front Drive Motor Control Module (Chopper OFF)
- P1BC800 IGBT Three-phase Temperature Check Fault Alarm for Front Drive Motor Control Module
- P1BB600 Overvoltage on the High Voltage Side of Front Drive Motor Control Module
- P1BB500 Undervoltage on the High Voltage Side of Front Drive Motor Control Module
- P1BB700 Voltage Sampling Fault of Front Drive Motor Control Module
- P1BBA00 EEPROM Error of Front Drive Motor Control Module
- P1BBC00 DSP Reset Fault of Front Drive Motor Control Module
- P1BF100 IPM Temperature Sampling of Front Drive Motor Control Module Abnormal
- P1BCF00 Temperature Sensor Fault of Front Drive Motor - Torque Limited
- P1BB100 IPM Fault of Front Drive Motor Control Module
- P1BC900 Hall Current Sensor A Fault of Front Drive Motor Control Module
- P1BC500 Hall Current Sensor B Fault of Front Drive Motor Control Module
- P1BC600 Hall Current Sensor C Fault of Front Drive Motor Control Module
- U015229 Motor Control Module Receiving SRS Hardwire Signal Abnormally
- P1BB800 Collision Signal Fault of Front Drive Motor Control Module
- P1BC200 Phase A of Front Drive Motor Lost
- P1BC300 Phase B of Front Drive Motor Lost
- P1BC400 Phase C of Front Drive Motor Lost
- P1BBD00 Active Release Fault of Front Drive Motor Control Module
- U011100 Communication with BMC Failed
- U014187 Communication with the vehicle control unit failed
- P1BD119 Drive CPLD Overcurrent of Front Drive Motor Control Module
- P1BD117 Drive CPLD Overvoltage of Front Drive Motor Control Module
- P1BD000 Drive DSP1 Crash Fault of Front Drive Motor Control Module
- P1BD400 Drive CPLD Running Fault of Front Drive Motor Control Module
- P1BD200 Drive CPLD Detecting IGBT Upper Axle Fault of Front Drive Motor Control Module
- P1BD300 Drive CPLD Detecting IGBT Lower Axle Fault of Front Drive Motor Control Module
- P1B2516 Supply Voltage on the Low Voltage Side Too Low
- P1B2517 Supply Voltage on the Low Voltage Side Too High
- P1BC700 IPM Radiator of Front Drive Motor Control Module Overtemperature
- U015129 Motor Control Module Receiving SRS CAN Signal Abnormally
- P1BC000 Front Drive Motor Rotary Transformer Fault - Angle Abnormal
- P1BBF00 Front Drive Motor Rotary Transformer Fault - Signal Lost
- P1BC100 Front Drive Motor Rotary Transformer Fault- Signal Amplitude Decreasing
- P1BB900 Cap Opening Protection of Front Drive Motor Control Module
- P1D6A00 Infinity Fan Motor Open-circuited
- DTC Diagnosis of Battery Management Control Module
- U110387 Communication with Airbag ECU Failed
- P1AC000 Collision Alarm of Airbag ECU
- P1A6000 High Voltage Interlock 1 Fault
- P1AFC00 On-board Charger High Voltage Interlock Fault
- P1AFD00 DC-DC High Voltage Interlock Fault
- P1AFB00 Air Conditioning System High Voltage Interlock Fault
- U20B800 BIC9 CAN Communication Timeout Fault
- U014B87 Communication with DC Charging Cabinet Failed
- P1AD900 Temperature Sampling Point of Charging Port Abnormal (China Standard)
- P1AD900 Temperature Sampling Point of Charging Port Abnormal (European standard, 7kW)
- P1AD900 Temperature Sampling Point of Charging Port Abnormal (European standard, 11kW)
- P1AD900 Temperature Sampling Point of Charging Port Abnormal (Japanese Standard)
- P1AD44B Temperature of Charging Port 1 Generally High (China Standard)
- P1AD44B Temperature of Charging Port 1 Generally High (European Standard, 7kW)
- P1AD44B Temperature of Charging Port 1 Generally High (European Standard, 11kW)
- P1AD44B Temperature of Charging Port 1 Generally High (Japanese Standard)
- P1AD54B Temperature of Charging Port 2 Generally High (China Standard)
- P1AD54B Temperature of Charging Port 2 Generally High (European Standard, 7kW)
- P1AD54B Temperature of Charging Port 2 Generally High (European Standard, 11kW)
- P1AD54B Temperature of Charging Port 2 Generally High (Japanese Standard)
- P1AD698 Temperature of Charging Port 3 Generally High (China Standard)
- P1AD698 Temperature of Charging Port 3 Generally High (European Standard, 7kW)
- P1AD698 Temperature of Charging Port 3 Generally High (European Standard, 11kW)
- P1AD698 Temperature of Charging Port 3 Generally High (Japanese Standard)
- U015587 Communication with Instrument Panel Cluster Failed
- P1AC900 DC Charging Inductive Signal Disconnected
- P1AE800 DC Charging Positive Contactor Echo Check Fault
- P1AE900 DC Charging Negative Contactor Echo Check Fault
- P1ACB07 DC Charging Positive Contactor Sintered
- P1ACC07 DC Charging Negative Contactor Sintered
- P2B9100 Voltage of DC Charging Port Abnormal
- Chassis
- Suspension System
- Front Subframe
- Diagnosis Description
- Diagnosis of General Faults
- Rear Suspension Arm
- Diagnosis Description
- Diagnosis of General Faults
- Drive System
- Transmission Shaft
- Diagnosis Description
- Diagnosis of General Faults
- Wheel System
- Diagnosis Description
- Diagnosis of General Faults
- Brake System
- Intelligent Power Brake System
- Diagnosis Description
- Basic Troubleshooting Process
- DTC Diagnosis
- P056200 System Voltage Too Low
- P056300 System Voltage Too High
- C004900 Brake Fluid Level Under Normal Value
- C050000 Left Front Wheel Speed Sensor Getting Broken Circuit
- C003200 Supply Voltage of Left Front Wheel Speed Sensor Low
- C050300 Short Circuit Between Signal Line and Supply Line of Left Front Wheel Speed Sensor
- C050200 Short Circuit Between Signal Line and Ground Line of Left Front Wheel Speed Sensor
- C003100 Left Front Wheel Speed Sensor Signal Fault
- C050576 Incorrect Installation Direction of Left Front Wheel Speed Sensor
- C050400 Left Front Wheel Speed Sensor Air Gap Abnormal
- C050600 Right Front Wheel Speed Sensor Getting Broken Circuit
- C003500 Supply Voltage of Right Front Wheel Speed Sensor Low
- C050900 Short Circuit Between Signal Line and Supply Line of Right Front Wheel Speed Sensor
- C050800 Short Circuit Between Signal Line and Ground Line of Right Front Wheel Speed Sensor
- C003400 Right Front Wheel Speed Sensor Signal Fault
- C050B76 Incorrect Installation Direction of Right Front Wheel Speed Sensor
- C050A00 Right Front Wheel Speed Sensor Air Gap Abnormal
- C050C00 Left Rear Wheel Speed Sensor Getting Broken Circuit
- C003800 Supply Voltage of Left Rear Wheel Speed Sensor Low
- C050F00 Short Circuit Between Signal Line and Supply Line of Left Rear Wheel Speed Sensor
- C050E00 Short Circuit Between Signal Line and Ground Line of Left Rear Wheel Speed Sensor
- C003700 Left Rear Wheel Speed Sensor Signal Fault
- C051176 Incorrect Installation Direction of Left Rear Wheel Speed Sensor
- C051000 Left Rear Wheel Speed Sensor Air Gap Abnormal
- C051200 Right Rear Wheel Speed Sensor Getting Broken Circuit
- C003B00 Supply Voltage of Right Rear Wheel Speed Sensor Low
- C051500 Short Circuit Between Signal Line and Supply Line of Right Rear Wheel Speed Sensor
- C051400 Short Circuit Between Signal Line and Ground Line of Right Rear Wheel Speed Sensor
- C003A00 Right Rear Wheel Speed Sensor Signal Fault
- C051776 Incorrect Installation Direction of Right Rear Wheel Speed Sensor
- C051600 Right Rear Wheel Speed Sensor Air Gap Abnormal
- U043204 Yaw Rate Sensor Signal Communication Timeout
- C006 A01 Yaw Rate Sensor Parameter Wrongly Configured
- C051D01 Yaw Rate Sensor Wrongly Calibrated
- C006A02 Yaw Rate Sensor Signal Incorrect
- C052901 Angle Sensor Module Lost
- C106600 Angle Sensor Not Calibrated
- C05CB00 Circuit Voltage of Master Cylinder Position Sensor A Too Low
- C05CA00 Circuit Voltage of Master Cylinder Position Sensor A Too High
- C007500 Master Cylinder Position Sensor A Fault/Short Circuit
- P229900 Master Cylinder Position Sensor Signal Calibration Error
- C05CE00 Circuit Voltage of Master Cylinder Position Sensor B Too Low
- C05CD00 Circuit Voltage of Master Cylinder Position Sensor B Too High
- C05D000 Master Cylinder Position Sensor Signal Value Incorrect
- C05D200 Master Cylinder Stroke Exceed Expected Value
- C000100 CSV Valve 1 Fault
- C000200 PSV Valve 1 Fault
- C000300 CSV Valve 2 Fault
- C000400 PSV Valve 2 Fault
- C05D500 TSV Valve Fault
- C002400 SSV Valve Fault
- C001000 Left Front Inlet Valve Fault
- C001100 Left Front Outlet Valve Fault
- C001400 Right Front Inlet Valve Fault
- C001500 Right Front Outlet Valve Fault
- C001800 Left Rear Inlet Valve Fault
- C001900 Left Rear Outlet Valve Fault
- C001C00 Right Rear Inlet Valve Fault
- C001D00 Right Rear Outlet Valve Fault
- P25C600 Circuit Voltage of Brake Booster Temperature Sensor A Too Low
- P25C700 Circuit Voltage of Brake Booster Temperature Sensor A Too High
- C057900 Circuit Voltage of Brake Booster Temperature Sensor B Too Low
- C057A00 Circuit Voltage of Brake Booster Temperature Sensor B Too High
- C057F00 Brake Booster Motor Open-circuited
- C05C24B Temperature of Brake Booster Motor Too High
- C059400 Brake Booster Motor Load Abnormal
- C058200 Circuit Signal of Brake Booster Motor Abnormal
- C059000 Supply Current of Brake Booster Motoris Too High
- C058900 Circuit Voltage of Brake Booster Motor Position Sensor A Too High
- C058800 Circuit Voltage of Brake Booster Motor Position Sensor A Too Low
- C058A00 Circuit Voltage of Brake Booster Motor Position Sensor A Abnormal
- C059100 Supply Current of Brake Booster Motor Too Low
- C05C200 Brake Booster Motor A Overtemperature
- C002192 Brake Booster Module Pipeline Hydraulic Pressure Below Normal Value
- C056B00 Brake Booster Module Pressure Sensor Fault
- C053F00 Circuit Voltage of Pressure Sensor A Too High
- C053E00 Circuit Voltage of Pressure Sensor A Too Low
- C053D00 Pressure Sensor B Signal Abnormal
- C054100 Pressure Sensor B Signal Abnormal
- C054200 Circuit Voltage of Pressure Sensor B Too Low
- C054300 Circuit Voltage of Pressure Sensor B Too High
- C12F909 Brake Hydraulic Circuit Blocked
- C055E00 Brake Hydraulic Circuit A Leaky
- C05B001 Brake Hydraulic Circuit L1 Leaky
- C2A1700 Brake Hydraulic Circuit L1 Overcompensation (Air Present)
- P060B00 ECU Hardware Fault (A/D Processor)
- P060700 ECU Hardware Fault
- P06B800 ECU Internal Control Module Fault (NVRAM Memory)
- P060400 ECU Internal Control Module Fault (RAM)
- P060500 ECU Internal Control Module Fault (ROM)
- P060C00 ECU Internal Control Module Fault (Program Running)
- U030000 ECU Internal Control Module Software Fault
- U300000 Microprocessor Error in ECU
- C055000 ECU Fault
- P060600 ECM/PCM Processor Fault
- C1A3800 System Not Fully Initialized
- C120700 Pump Not Returnable
- C055F92 Hydraulic Unit Fault
- EPB
- Diagnosis Description
- Basic Troubleshooting Process
- Diagnosis of General Faults
- DTC Diagnosis
- U300316 Battery Soft Undervoltage (independent)
- U300317 Battery Soft Overvoltage (independent)
- C117009 EPB Switch Fault (independent)
- C11B013 Left Motor or Line Fault (independent)
- C11B113 Right Motor or Line Fault (independent)
- C110009 Control Module Main Chip Fault (independent)
- C11A006 Actuator Overloaded (independent)
- U300316 Battery Soft Undervoltage (integrated)
- U300317 Battery Soft Overvoltage (integrated)
- C117009 EPB Switch Fault (integrated)
- C11B013 Left Motor or Line Fault (integrated)
- C11B113 Right Motor or Line Fault (integrated)
- C110009 Control Module Main Chip Fault (integrated)
- C11A006 Actuator Overloaded (integrated)
- Steering System
- Electric Power Steering System
- Diagnosis Description
- Basic Troubleshooting Process
- Diagnosis of General Faults
- DTC Diagnosis
- C1B9D21 Power Voltage Too Low
- C1B9D21 Power Voltage Too Low - TRW
- C1B9D22 Power Voltage Too High
- C1B9C23 Main/Auxiliary/Torque Signal Keeping at Low Level
- C1B9C24 Main/Auxiliary/Torque Signal Keeping at High Level
- U016002 Duty Cycle of Main/Auxiliary/Main + Auxiliary Torque Signal Abnormal
- U015A38 Main/Auxiliary/Torque Signal Period Abnormal
- C1BA023 Main/Auxiliary Angle Signal Keeping at Low Level
- C1BA024 Main/Auxiliary Angle Signal Keeping at High Level
- U015B02 Duty Cycle of Main/Auxiliary Angle Signal Abnormal
- U015D86 Angle Signal Not Available
- C1BA500 ECU Operation Error
- C1BA600 ECU Overtemperature
- C1BA700 ECU ROM and Check Failed
- C1B6044 ECU RAM Fault
- C1BA900 Supply Voltage of Torque Sensor Abnormal
- C1BAA00 Motor Drive Circuit Failed
- C1BAB21 Output Voltage of Temperature Detection Circuit Too Low
- C1BAB22 Output Voltage of Temperature Detection Circuit Too High
- U015E31 Motor Rotor Position Signal Fault
- C1BAE00 ECU Not Executing Angle Calibration Order
- U015F86 Received ESP Signal Not Available
- U015887 Communication with ESP Lost -YB
- U015887 Communication with ESP Lost -TRW
- C1BB200 ESP Speed Data Error
- U015987 Communication with VTOG Lost -YB
- U015987 Communication with VTOG Lost -TRW
- C1B9000 Power Loss - YB
- C1B9000 Power Loss - TRW
- Body
- Wiper and Washer
- Front Wiper
- Diagnosis Description
- Basic Troubleshooting Process
- Diagnosis of General Faults
- Front Wiper Not Working
- Front Wiper LOW Not Working
- Front Wiper HIGH Not Working
- Front Wiper Cannot Be Reset
- DTC Diagnosis
- B1BE801 Detection Signal of Front Wiper HIGH Swtich Hardwire Fault
- B1BF400 Front Wiper Reset Signal Fault
- Rear Wiper
- Diagnosis Description
- Basic Troubleshooting Process
- Diagnosis of General Faults
- DTC Diagnosis
- B1C0D12 Rear Wiper Reset Signal Fault
- Washing System
- Diagnosis Description
- Basic Troubleshooting Process
- DTC Diagnosis
- B1C0D12 Washer Motor Short-circuited
- B1C0D13 Washer Motor Open-citcuited
- B1C0D71 Washer Motor Stalling
- Roof
- Sunroof
- Diagnosis Description
- Basic Troubleshooting Process
- Diagnosis of General Faults
- DTC Diagnosis
- B225407 Sunroof Switch Stuck
- B222400 Sunroof Hall Sensor Signal Abnormal
- B225513 Sunroof Motor Open-citcuited
- B225511 Sunroof Motor Short-circuited (Shorted to Ground)
- B225300 Sunroof Initialization Lost
- B225707 Blinder Switch Stuck
- B222401 Blinder Motor Hall Sensor Signal Abnormal
- B225813 Blinder Motor Open-citcuited
- B225811 Blinder Motor Short-circuited (Shorted to Ground)
- B225600 Blinder Initialization Lost
- Interior and Exterior Trim
- Rearview Mirror
- Electric Outside Rearview Mirror
- Diagnosis Description
- Basic Troubleshooting Process
- DTC Diagnosis
- B1CDF11 Left&Right Commutator Motor Drive Circuit of Left Rearview Mirror Shorted to Ground
- B1CDF12 Left&Right Commutator Motor Drive Circuit of Left Rearview Mirror Shorted to Power
- B1CDF13 Left&Right Commutator Motor Drive Circuit of Left Rearview Mirror Broken
- B1CDF19 Left&Right Commutator Motor Drive of Left Rearview Mirror Overloaded
- B1CE011 Up&Down Commutator Motor Drive Circuit of Left Rearview Mirror Shorted to Ground
- B1CE012 Up&Down Commutator Motor Drive Circuit of Left Rearview Mirror Shorted to Power
- B1CE013 Up&Down Commutator Motor Drive Circuit of Left Rearview Mirror Broken
- B1CE019 Up&Down Commutator Motor Drive of Left Rearview Mirror Overloaded
- B1CE111 Folding Motor Drive Circuit of Left Rearview Mirror Shorted to Ground
- B1CE112 Folding Motor Drive Circuit of Left Rearview Mirror Shorted to Power
- B1CE113 Folding Motor Drive Circuit of Left Rearview Mirror Broken
- B1CE119 Folding Motor Drive of Left Rearview Mirror Overloaded
- B1CE211 Left&Right Commutator Motor Drive Circuit of Right Rearview Shorted to Ground
- B1CE212 Left&Right Commutator Motor Drive Circuit of Right Rearview Mirror Shorted to Power
- B1CE213 Left&Right Commutator Motor Drive Circuit of Right Rearview Mirror Broken
- B1CE219 Left&Right Commutator Motor Drive of Right Rearview Mirror Overloaded
- B1CE311 Up&Down Commutator Motor Drive Circuit of Right Rearview Mirror Shorted to Ground
- B1CE312 Up&Down Commutator Motor Drive Circuit of Right Rearview Mirror Shorted to Power
- B1CE313 Up&Down Commutator Motor Drive Circuit of Right Rearview Mirror Broken
- B1CE319 Up&Down Commutator Motor Drive of Right Rearview Mirror Overloaded
- B1CE411 Folding Motor Drive Circuit of Right Rearview Mirror Shorted to Ground
- B1CE412 Folding Motor Drive Circuit of Right Rearview Mirror Shorted to Power
- B1CE413 Folding Motor Drive Circuit of Right Rearview Mirror Broken
- B1CE419 Folding Motor Drive of Right Rearview Mirror Overloaded
- Electrical
- Safety and Protection System
- Supplemental Restraint System
- Diagnosis Description
- Basic Troubleshooting Process
- DTC Diagnosis
- B16001B Driver Frontal Airbag Not Connected
- B160A1A Resistance of Driver Frontal Airbag Equaling to 0
- B160111 Driver Frontal Airbag Shorted to Ground
- B160212 Driver Frontal Airbag Shorted to Power
- B16101B Front Passenger Frontal Airbag Not Connected
- B161A1A Resistance of Front Passenger Frontal Airbag Equaling to 0
- B161111 Front Passenger Frontal Airbag Shorted to Ground
- B161212 Front Passenger Frontal Airbag Shorted to Power
- B16201B Driver's Side Airbag Not Connected
- B162A1A Resistance of Driver's Side Airbag Equaling to 0
- B162111 Driver's Side Airbag Shorted to Ground
- B162212 Driver's Side Airbag Shorted to Power
- B16301B Front Passenger's Side Airbag Not Connected
- B163B1B Resistance of Front Passenger's Side Airbag Equaling to 0
- B163111 Front Passenger's Side Airbag Shorted to Ground
- B163212 Front Passenger's Side Airbag Shorted to Power
- B17041B Left Air Curtain Not Connected
- B17081A Resistance of Left Air Curtain Equaling to 0
- B170511 Left Air Curtain Shorted to Ground
- B170612 Left Air Curtain Shorted to Power
- B170D1B Right Air Curtain Not Connected
- B17121A Resistance of Right Air Curtain Equaling to 0
- B170E11 Right Air Curtain Shorted to Ground
- B170f12 Right Air Curtain Shorted to Power
- B16401B Driver Seat Belt Pretensioner Not Connected
- B16451A Resistance of Driver Seat Belt Pretensioner Equaling to 0
- B164111 Driver Seat Belt Pretensioner Shorted to Ground
- B164212 Driver Seat Belt Pretensioner Shorted to Power
- B164A1B Front Passenger Seat Belt Pretensioner Not Connected
- B164F1A Resistance of Front Passenger Seat Belt Pretensioner Equaling to 0
- B164B11 Front Passenger Seat Belt Pretensioner Shorted to Ground
- B164C12 Front Passenger Seat Belt Pretensioner Shorted to Power
- B165400 Left front impact sensor not connected
- B165511 Left Front Frontal Impact Sensor Shorted to Ground
- B165D00 Right Front Frontal Impact Sensor Not Connected
- B165e11 Right Front Frontal Impact Sensor Shorted to Ground
- B166600 Left Side Impact Sensor Not Connected
- B166711 Left Side Impact Sensor Shorted to Ground
- B166f00 Right Side Impact Sensor Not Connected
- B167011 Right Side Impact Sensor Shorted to Ground
- B169416 SRS_ECU Fault
- B169517 SRS_ECU Fault
- B169D00 SRS_ECU Fault
- B169700 SRS_ECU Fault
- B169800 SRS_ECU Fault
- B169C00 SRS_ECU Fault
- B16B000 SRS_ECU Fault
- B16AE00 SRS_ECU Fault
- B169F00 SRS_ECU Fault
- B16A100 SRS_ECU Fault
- B17921A Front-row Right Seat Belt Pretensioner 2 Resistance = 0
- B17921B Front-row Right Seat Belt Pretensioner 2 Not Connected
- B17941A Front Right Far Side Airbag Module Resistance = 0
- B17941B Front Right Far Side Airbag Module Not Connected
- B16E900 Front Right Door Pressure Sensor Not Connected
- Access and Anti-theft System
- Smart Key System
- Diagnosis Description
- Basic Troubleshooting Process
- Diagnosis of General Faults
- All Remote Control Functions of Electronic Smart Key Fail (Holding A Legal Key In The Remote Control Area)
- The remote control functions are normal, but the micro switch of the right front door handle do not act (holding a legal key in the detection area)
- DTC Diagnosis
- B22A613 Exterior Right Front Detection Antenna Open-Circuited
- B227C13 Interior Front Detection Antenna Open-circuited
- B22A813 Exterior Trunk Detection Antenna Open-circuited
- B227D13 Interior Middle Detection Antenna Open-circuited
- B227E13 Interior Rear Detection Antenna Open-circuited
- B229D17 Oversupply of High Frequency Receiver Module
- B229D16 Undersupply of High Frequency Receiver Module
- Charging Port Cap Control
- Charging Port Cover Actuator
- Diagnosis Description
- Diagnosis of General Faults
- Charging Port Cap Cannot Be Unlocked or Locked
- Low Voltage Power and Distribution
- Backup power
- Diagnosis Description
- Diagnosis of General Faults
- 12V Power Socket Not Working
- Front USB Power Interface Not Working - HUSB
- Rear USB Power Interface Not Working - LUSB
- Rear USB Power Interface Not Working - HUSB
- Wireless Charging Module
- Diagnosis Description
- Basic Troubleshooting Process
- Diagnosis of General Faults
- Wireless Charging Not Working
- DTC Diagnosis
- U014087 Communication with BCM Lost
- B2FD017 High Power Voltage Alarm
- B2FD016 Low Power Voltage Alarm
- B2FD14B Wireless Charging Overtemperature Alarm
- Instrumentation and Warning Systems
- Instrument Panel Cluster
- Diagnosis Description
- DTC Diagnosis
- B2342 Internal Fault of Instrument
- B234A CAN Bus Receiving Incorrect Coolant Temperature Signal
- B234C CAN Bus Receiving Incorrect Speed Signal
- B234D Information Switching Key Input Device Short-circuited
- U1101 Communication Between Instrument and Combination Switch Interrupted
- U1103 Communication Between Instrument and SRS Interrupted
- U0146 Communication Between Instrument and Gateway Interrupted
- U0164 communication with air conditioning system lost
- U0245 Communication Between Instrument Panel and Multimedia Interrupted
- B2343 Clock Running Fault
- B236009 Display Fault (Backlight Fault) or Display Chip Fault
- Driver Assistance
- Park Assist System
- Diagnosis Description
- Basic Troubleshooting Process
- DTC Diagnosis
- B1B5712 Signal Line of Left Front Corner Sensor Shorted to Power or Not Grounded
- B1B5714 Signal Line of Left Front Corner Sensor Shorted to Ground or Open-circuited
- B1B5900 Afterwave Time Fault of Front Left Corner Sensor
- B1B5700 Internal Fault of Left Front Corner Sensor
- B1B5412 Signal Line of Right Front Corner Sensor Shorted to Power or Not Grounded
- B1B5414 Signal Line of Right Front Corner Sensor Shorted to Ground or Open-circuited
- B1B5600 Afterwave Time Fault of Right Front Corner Sensor
- B1B5400 Internal Fault of Right Front Corner Sensor
- B1B5112 Left Rear Corner Sensor Signal Line Shorted to Power or Not Grounded
- B1B 5114 Signal Line of Left Rear Corner Sensor Shorted to Ground or Open-circuited
- B1B5300 Afterwave Time Fault of Left Rear Corner Sensor
- B1B5100 Internal Fault of Left Rear Corner Sensor
- B1B4812 Right Rear Corner Sensor Signal Line Shorted to Power or Not Grounded
- B1B4814 Signal Line of Right Rear Corner Sensor Shorted to Ground or Open-circuited
- B1B4A00 Afterwave Time Fault of Right Rear Corner Sensor
- B1B4800 Internal Fault of Right Rear Corner Sensor
- B1B4E12 Left Rear Center Sensor Signal Line Shorted to Power or Not Grounded
- B1B4E14 Signal Line of Left Rear Center Sensor Shorted to Ground or Open-circuited
- B1B5000 Afterwave Time Fault of Left Rear Center Sensor
- B1B4E00 Internal Fault of Left Rear Center Sensor
- B1B4B12 Right Rear Center Sensor Signal Line Shorted to Power or Not Grounded
- B1B4B14 Signal Line of Right Rear Center Sensor Shorted to Ground or Open-circuited
- B1B4D00 Afterwave Time Fault of Right Rear Center Sensor
- B1B4B00 Internal Fault of Right Rear Center Sensor
- Networking and Communication
- Gateway System
- Diagnosis Description
- Basic Troubleshooting Process
- Diagnosis of General Faults
- Communication with Front Collision Warning Radar Module Lost
- Communication with Multifunction Video Controller Lost
- Communication with Electric Compressor Lost
- Communication with Combination Switch Lost
- Body Network Bus Off
- Chassis Network Bus Off
- Energy Network Bus Off
- PEPS Network Bus Off
- Exterior Lighting System
- Combination Headlight
- Diagnosis Description
- Diagnosis of General Faults
- Left Front Low Beam Not Working
- Right Front Low Beam Not Working
- Left and Right Front Low Beams Not Working at the Same Time
- Left Front High Beam Not Working
- Right Front High Beam Not Working
- Left and Right Front High Beams Not Working at the Same Time
- Left Front Turn Signal Not Working
- Right Front Turn Signal Not Working
- Left Front Position Light Not Working
- Right Front Position Light Not Working
- Left Front Daytime Running Light Not Working
- Right Front Daytime Running Light Not Working
- Front Middle Position Light
- Diagnosis Description
- Diagnosis of General Faults
- Front Middle Position Light Not Working
- Logo Light Not Working
- Side Turn Signal
- Diagnosis Description
- Diagnosis of General Faults
- Left Turn Signal Not Working
- Right Turn Signal Not Working
- Left Foot Light Not Working
- Right Foot Light Not Working
- Combination Rear Lights
- Diagnosis Description
- Diagnosis of General Faults
- Left Rear Position Light Not Working
- Right Rear Position Light Not Working
- Left Rear Turn Signal Not Working
- Right Rear Turn Signal Not Working
- Left Rear Brake Light Not Working
- Right Rear Brake Light Not Working
- Middle Combination Rear Light
- Diagnosis Description
- Diagnosis of General Faults
- Left Middle Position Light Not Working
- Right Middle Position Light Not Working
- Left Rear Reversing Light Not Working
- Right Rear Reversing Light Not Working
- Left Rear Middle Turn Signal Not Working
- Right Rear Middle Turn Signal Not Working
- High-mount Stop Light
- Diagnosis Description
- Diagnosis of General Faults
- High-mount Stop Light Not Working
- Brake Switch Fault
- Rear Fog Light
- Diagnosis Description
- Diagnosis of General Faults
- Rear Fog Light Not Working
- License Plate Light
- Diagnosis Description
- Diagnosis of General Faults
- Left License Plate Light Not Working
- Right License Plate Light Not Working
- Interior Lighting System
- Vanity Mirror Light
- Diagnosis Description
- Diagnosis of General Faults
- Left Vanity Mirror Light Not Working
- Right Vanity Mirror Light Not Working
- Both Vanity Mirror Lights Not Working
- Front Interior Light Assembly
- Diagnosis Description
- Diagnosis of General Faults
- Front Interior Light Not Working
- Front Interior Light Door Control Function Not Working
- Rear Interior Light Assembly
- Diagnosis Description
- Diagnosis of General Faults
- Left Rear Dome Light Not Working
- Left Rear Dome Light Door Control Function Not Working
- Right Rear Dome Light Not Working
- Right Rear Dome Light Door Control Function Not Working
- Glove Box Light
- Diagnosis Description
- Diagnosis of General Faults
- Glove Box Light Not Working
- Door Light
- Diagnosis Description
- Basic Troubleshooting Process
- Diagnosis of General Faults
- DTC Diagnosis
- B1CDD11 Right Front Door Light Drive Circuit Shorted to Ground
- B1CDD12 Right Front Door Light Drive Circuit Shorted to Power
- B1CDD13 Right Front Door Light Drive Circuit Broken
- B1CDD19 Right Front Door Drive Overloaded
- B1CDB11 Left Front Door Light Drive Circuit Shorted to Ground
- B1CDB12 Left Front Door Light Drive Circuit Shorted to Power
- B1CDB13 Left Front Door Light Drive Circuit Broken
- B1CDB19 Left Front Door Drive Overloaded
- Trunk Light
- Diagnosis Description
- Basic Troubleshooting Process
- Diagnosis of General Faults
- Trunk Light Not Working
- DTC Diagnosis
- B1CDA11 Trunk Light Drive Circuit Shorted to Ground
- B1CDA12 Trunk Light Drive Circuit Shorted to Power
- B1CDA13 Trunk Light Drive Circuit Broken
- B1CDA19 Trunk Light Drive Overloaded
- Footwell Light
- Diagnosis Description
- Basic Troubleshooting Process
- Diagnosis of General Faults
- DTC Diagnosis
- B1CE911 Left Foot Light Drive Circuit Shorted to Ground
- B1CE912 Left Foot Light Drive Circuit Shorted to Power
- B1CE913 Left Foot Light Drive Circuit Broken
- B1CE919 Left Foot Light Drive Overloaded
- B1CEB11 Right Foot Light Drive Circuit Shorted to Ground
- B1CEB12 Right Foot Light Drive Circuit Shorted to Power
- B1CEB13 Right Foot Light Drive Circuit Broken
- B1CEB19 Right Foot Light Drive Overloaded
- Ambient Light System
- Diagnosis Description
- Basic Troubleshooting Process
- Diagnosis of General Faults
- DTC Diagnosis
- B11BD11 LIN1 Ambient Light Drive Circuit Shorted to Ground
- B11BD12 LIN1 Ambient Light Drive Circuit Shorted to Power
- B11BD13 LIN1 Ambient Light Drive Circuit Broken
- B11BD19 LIN1 Ambient Light Overloaded
- B11BE11 LIN2 Ambient Light Drive Circuit Shorted to Ground
- B11BE12 LIN2 Ambient Light Drive Circuit Shorted to Power
- B11BE13 LIN2 Ambient Light Drive Circuit Broken
- B11BE19 LIN2 Ambient Light Overloaded
- Charging Port Light
- Diagnosis Description
- Basic Troubleshooting Process
- Diagnosis of General Faults
- DTC Diagnosis
- B1C5E11 Right Charging Port Light Drive Circuit Shorted to Ground
- B1C5E12 Right Charging Port Light Drive Circuit Shorted to Power
- B1C5E13 Right Charging Port Light Drive Circuit Broken
- B1C5E19 Right Charging Port Light Overloaded
- Air Conditioner
- Air Conditioning System
- Diagnosis Description
- Basic Troubleshooting Process
- Diagnosis of General Faults
- Air Conditioner Refrigeration Not Cold Enough
- Peculiar Smell When Air Conditioner Enabled
- Compressor Not Working
- Diagnosis of air conditioner DTC
- B2AD616 12V Power Undervoltage (Lower Than 9V)
- B2AD617 12V Power Overvoltage
- B2A2013 Interior Temperature Sensor Open-circuited
- B2A2111 Interior Temperature Sensor Shorted to Ground
- B2A2213 Exterior Temperature Sensor Open-circuited
- B2A2311 Exterior Temperature Sensor Shorted to Ground
- B2A2413 Evaporator Temperature Sensor Open-circuited
- B2A2511 Evaporator Temperature Sensor Circuit Shorted to Ground
- B2A5813 Driver's Side Face Outlet Temperature Sensor Open-circuited
- B2A5811 Driver's Side Face Outlet Temperature Sensor Shorted to Ground
- B2A5913 Driver's Side Floor Outlet Temperature Sensor Open-circuited
- B2A5811 Driver's Side Floor Outlet Temperature Sensor Shorted to Ground
- B2A0813 Evaporator Outlet Refrigerant Temperature Sensor Open-circuited
- B2A0811 Evaporator Outlet Refrigerant Temperature Sensor Shorted to Ground
- B134613 Refrigerant Temperature Sensor 1 Getting Broken Circuit
- B134611 Refrigerant Temperature Sensor 1 Shorted to Ground
- B133413 Refrigerant Temperature Sensor 2 Getting Broken Circuit
- B133511 Refrigerant Temperature Sensor 2 Shorted to Ground
- B133613 Refrigerant Temperature Sensor 3 Getting Broken Circuit
- B133711 Refrigerant Temperature Sensor 3 Shorted to Ground
- B2A0803 Evaporator Outlet Refrigerant Pressure Sensor Open-circuited
- B2A0801 Evaporator Outlet Refrigerant Pressure Sensor Shorted to Power
- B134713 Air Conditioner Pressure Sensor Getting Broken Circuit
- B134711 Air Conditioner Pressure Sensor Shorted to Power
- B2A2A14 Mode Motor Shorted to Ground or Open-circuited
- B2A2A12 Mode Motor Shorted to Power
- B2A2A92 Mode Motor Not Rotating in Place
- B2A4B14 Circulation Motor Shorted to Ground or Open-circuited
- B2A4B12 Circulation Motor Shorted to Power
- B2A4B92 Circulation Motor Not Rotating in Place
- B2A2B14 Heating-Cooling Motor Shorted to Ground or Open-circuited
- B2A2B12 Heating-Cooling Motor Shorted to Power
- B2A2B92 Heating-Cooling Motor Not Rotating in Place
- B134111 Three-way Valve Motor Shorted to Ground or Open-circuited
- B134211 Three-way Valve Motor Shorted to Power
- B134392 Three-way Valve Motor Not Rotating in Place
- B2A3214 Front Blower Shorted to Ground or Open-circuited
- B2A3314 Front Blower Adjustment Signal Harness Shorted to Ground or Open-circuited
- B133800 Solenoid Valve 1 Status Fault
- B133900 Solenoid Valve 2 Status Fault
- B133A00 Solenoid Valve 3 Status Fault
- B133B00 Solenoid Valve 4 Status Fault
- B133C00 solenoid valve 5 status fault
- B133D00 Solenoid Valve 6 Status Fault
- B133E00 low voltage PTC relay 1 fault
- B133F00 low voltage PTC relay 2 fault
- B134000 low voltage PTC relay 3 fault
- B2A2712 Sunlight Sensor Circuit Shorted to Power
- B1CAF00 Humidity Sensor Fault
- U02087 Communication with Humidity Sensor Lost
- U025387 Communication with compressor lost
- B2A2F09 Air Conditioner Pipeline in High or Low Pressure State
- Diagnosis of Air Conditioner Compressor DTC
- B2AB997 Overload
- B2AB049 Current Sampling Circuit Fault
- B2AB149 Motor Phase Lost
- B2AB249 IPM IGBT Fault
- B2AB349 Internal Temperature Sensor Fault
- B2AB41D Excessive Internal Current
- B2AB573 Startup Failed
- B2AB64B Internal Temperature Abnormal
- B2AB774 Speed Abnormal
- B2AB81C Phase Voltage Too High
- B2ABB17 Overvoltage on the High Voltage Side
- B2ABC16 Voltage Low on the High Voltage Side
- B2ABA1C Fault at Internal Low Voltage Power
- DTC Diagnosis of PM 2.5
- B110A02 PM2.5 Quick Tester CAN Signal Fault
- B110B07 PM2.5 Quick Tester Air Pump Fault
- B110C09 PM2.5 Quick Tester Laser Diode Failure
- B110D09 PM2.5 Quick Tester Photoelectric Receiving Module Failure
- B110811 PM2.5 Quick Tester Short-circuited
- B110F09 PM2.5 Quick Tester Solenoid Valve Failure
- B110913 PM2.5 Quick Tester Getting Broken Circuit
- B110E09 PM2.5 Quick Tester Temperature and Humidity Module Failure
- B111009 ECU Internal Fault
- Horn
- Diagnosis Description
- Basic Troubleshooting Process
- Diagnosis of General Faults
- Woofer Not Working (Plan 1)
- Tweeter Not Working (Plan 1)
- Tweeter and Woofer Horns Not Working at the Same Time (Plan 1)
- Woofer Not Working (Plan 2)
- Tweeter Not Working (Plan 2)
- Tweeter and Woofer Horns Not Working at the Same Time (Plan 2)
- Switch and Wiring Harness
- Combination Switch
- Diagnosis Description
- Basic Troubleshooting Process
- DTC Diagnosis
- B24d800 Handle Input Power Undervoltage
- B24d700 Handle Input Power Overvoltage
- B24AC00 Wiper Handle Fault
- B24AB00 Light Handle Fault
- Multifunctional Steering Wheel Switch
- Diagnosis Description
- Basic Troubleshooting Process
- Diagnosis of General Faults
- Multifunction Steering Wheel Switch Not Working
- DTC Diagnosis
- B1E1007 EPPROM Fault
- B1E1907 Mute Switch Stuck
- B1E0507 Voice Switch Stuck
- B1E3107 Setting Switch Stuck
- B1E1A07 Custom Switch Stuck
- B1E3207 Reset Switch Stuck
- B1E2E07 Cancel Switch Stuck
- B1E2D07 Cruise Switch Stuck
- B1E2F07 SPEED UP Switch Stuck
- B1E3007 SPEED DOWN Switch Stuck
- B1E3407 TIME INTERVAL UP Switch Stuck
- B1E3307 TIME INTERVAL DOWN Switch Stuck
- B1E0007 VOLUME UP Switch Stuck
- B1E0707 VOLUME DOWN Switch Stuck
- B1E0107 CHANNEL UP Switch Stuck
- B1E0807 Channel- Switch Stuck
- B1E3507 Lane Offset Switch Stuck
- B1E0607 Panoramic Imaging System Switch Stuck
- B1E0207 Bluetooth Telephone Switch Stuck
- B1E0407 Mode Switch Stuck
- B1E1C07 Instrument Menu Return Switch Stuck
- B1E2000 Steering Wheel Built-in Vibration Motor Fault
- Supplementary Fault CodeDTC
- U01D108 Invalid Data Received from EPS
- U01BC31 ESC 123 Signal Fault Received
- U01BD31 ESC 220 Wheel Speed Direction Signal Fault Received
- U01BE31 ESC 222 Signal Fault Received (Yaw/ABS/EBD)
- B1C4194 Main chip control failure
- C059700 Exhaust Not Completed
- C1066FC SAS Calibration Error
- U029600 Communication with Power Battery Management Module Lost
- B134887 Communication with LIN throttle valve lost
- U01F708 VCU Signal Fault
- P230309 SPORT(MODE) Mode Switch Fault
- P230407 Normal Mode Switch Fault
- B2A2C92 Failure of Front Passenger's Seat Heating/Cooling Control Motor to Rotate into Position
- P1D3D71 Unlock Switch Stuck
- C121200 Camera Obstructed
- Overview
- Drawing Description
- Terms and Abbreviations
- Common Electrical Symbols
- Common Connector Disconnection Methods
- Common Connector Clamping Structures
- Circuit Testing
- Detailed update History
- Distribution and Description of Distribution Box
- Front Compartment Distribution Box
- Fuse
- Relay
- Instrument Distribution Box
- Fuse
- Power Supply - Circuit Diagram
- Power Supply of Front Compartment Distribution Box - Circuit Diagram
- Power Supply of Instrument Distribution Box - Circuit Diagram
- Ground Point - Circuit Diagram
- Front Compartment Wiring Harness Ground Point - Circuit Diagram
- Instrument Wiring Harness,Ceiling Wiring Harness and Door Wiring Harness Ground Point - Circuit Diagram
- Ground Points of Floor Wiring Harness - Circuit Diagram
- Wiring Harness Layout Diagram
- Front compartment wiring harness
- Instrument panel wiring harness
- Floor wiring harness
- Left Front Door Wiring Harness
- Right Front Door Wiring Harness
- Left Rear Door Wiring Harness
- Right Rear Door Wiring Harness
- Tailgate Wiring Harness
- High voltage wiring harness
- Ceiling Wiring Harness
- Rear Bumper Wiring Harness
- Front Bumper Wiring Harness
- Trailer Hitch Wire
- System circuit diagram
- Trailer Hitch System - Circuit Diagram
- Integrated Intelligent Control System - Circuit Diagram (European Standard 11 kW)
- Integrated Intelligent Control System - Circuit Diagram (European Standard 7 KW)
- Integrated Intelligent Control System - Circuit Diagram (Japanese Standard)
- Integrated Intelligent Control System - Circuit Diagram (Chinese Standard)
- High Voltage - Circuit Diagram
- Shift Control - Circuit Diagram
- Electronic Power Steering System (TWR)
- Electronic Power Steering System (YB)
- Intelligent Power Brake System - Circuit Diagram
- Electronic Parking Brake System - Circuit Diagram (independent)
- Electronic Parking Brake System - Circuit Diagram (integrated)
- Reverse Radar - Circuit Diagram
- ETC and Anti-dazzle Inside Rearview Mirror - Circuit Diagram
- ACC and Multifunction Video Monitoring - Circuit Diagram
- Blind Area Detection System - Circuit Diagram
- Emergency Rescue System - Circuit Diagram
- Smart Key System - Circuit Diagram
- Door Lock Motor, Front Compartment Cover, Charging Port Cover - Circuit Diagram (! ETS)
- Door Lock Motor, Front Compartment Cover, Charging Port Cover - Circuit Diagram (ETS)
- Interior Light - Circuit Diagram
- Backlight - Circuit Diagram
- Window Regulator System - Circuit Diagram
- Ambient Light - Circuit Diagram (for Monochrome handle model)
- Ambient Light - Circuit Diagram (for Multicolor handle model)
- Low Beam / High Beam - Circuit Diagram
- Turn Signal / Warning Light - Circuit Diagram
- Position Light and Daytime Light- Circuit Diagram
- Brake Light - Circuit Diagram
- Reversing Light and Fog Light - Circuit Diagram
- Instrument Panel Cluster - Circuit Diagram
- Horn - Circuit Diagram
- Multimedia System - Circuit Diagram (for without amplifier model)
- Multimedia System - Circuit Diagram (for power amplifier model)
- OBD Interface - Circuit Diagram
- Body Network - Circuit Diagram
- Chassis Network - Circuit Diagram
- Energy Network - Circuit Diagram
- Smart Access Network - Circuit Diagram
- Air Conditioning System - Circuit Diagram
- Power Tailgate - Circuit Diagram
- Airbag System - Circuit Diagram
- Seat Belt Warning - Circuit Diagram
- Sunroof - Circuit Diagram
- USB Charging, Backup Power and Wireless Charging - Circuit Diagram
- Wiper System - Circuit Diagram
- Power Driver Seat Circuit Diagram
- Front Passenger Seat - Circuit Diagram
- Outside Rearview Memory Adjustment - Circuit Diagram
- Outside Rearview Mirror and Rear Windshield Heating - Circuit Diagram
- Overview
- Update History
- Detailed update History
- Foreword
- How to Use the Manual
- Safety Instructions
- Main Process of Maintenance Operation
- Replacing Parts
- Directory Structure
- Safety and Protection
- Notes
- Emergency Treatment
- Safety Common Sense
- Safe Maintenance
- Battery Safety
- General Unit and Parameter Conversion
- Common Units
- Parameter Conversion
- Terms and Abbreviations
- Terms
- Abbreviation
- General Service Information
- Lifting and Towing Vehicle
- Lifting Vehicle
- Towing Vehicle
- Operation Before Maintenance of Low Voltage Electrical System
- Power-off and Power-on of Low Voltage Electrical System
- Operation Before Maintenance of High Voltage Electrical System
- Power-off and power-on of high voltage electrical system
- Maintenance Instructions
- Operating Tips
- Warnings and Precautions
- Safety Measures for Maintenance
- Important Warnings about Disconnecting the Low Voltage Battery
- Precautions for Inspection and Maintenance of High Voltage Circuit
- Precautions for Inspection and Maintenance of Front Compartment
- Precautions for Inspection and Maintenance of Supplemental Restraint System
- Important Warnings on Road Test
- Vehicle Information
- Identification Information
- Location of vehicle identification number (VIN)
- VDS Read VIN
- Description of vehicle identification number
- Description of vehicle nameplate
- Description of model and number of drive motor
- Parameter information
- Basic vehicle parameters
- Vehicle Oil Parameters
- Four-Wheel Alignment Parameters
- Technical Parameters of Braking System
- Maintenance
- Maintenance Information
- Maintenance Instructions
- Precautions for maintenance
- Maintenance cycle reminder and display
- General notes
- First Maintenance Information (Asia-Pacific Region Only)
- Regular Maintenance Information
- Additional Maintenance Information
- Maintenance Information Under Severe Working Conditions
- Filling of maintenance records
- Safe Operation Guide for Maintenance
- Maintenance
- Tools and Equipment Required for Maintenance
- Reading and Clearing of Fault Records
- Visual inspection of the inside and outside of the vehicle body
- Manual Reset of Maintenance Cycle
- Inspection of Automatic Control Function of Low Beam
- Inspection of exterior light function
- Inspection of interior light function
- Inspection and Adjustment of Headlight (Dimming Test Paper)
- Inspection and Adjustment of Headlight (Headlight Adjustment Tool)
- Inspection of electrical functions
- Inspection of on-board items
- Inspection of Seat Belt
- Inspection and Replacement of HEPA Filter
- Inspection and Cleaning of Sunroof
- Inspection and setting of power window function
- Inspection of washer fluid anti-freezing temperature
- Inspection of Washer Fluid Level
- Inspection of Wiping and Washing Functions
- Inspection of Wiper Blade Position
- Inspection of Wiper Blade State
- Inspection of Wiper Arm Lock Nut
- Inspection of Coolant Anti-Freezing Temperature
- Inspection of Coolant Level
- Lubrication of Door Brake
- Lubrication of hood lock catch
- Inspection of Hood Lock Body Assembly
- Inspection of 12 V Battery Wiring Harness
- Inspection of 12 V Battery Voltage
- Visual inspection of high-voltage components and wires
- Inspection of Warning Labels for High-Voltage Components
- Inspection of charging port
- Visual inspection of electric powertrain and front compartment components
- Inspection of Tire Pressure
- Inspection of tires
- Tire Rotation
- Inspection and Calibration of Tire Pressure Monitoring Display
- Inspection of Wheel Fixing Nut Torque
- Inspection of Steering Wheel
- Inspection of brake pad thickness
- Inspection of Brake Disc
- Inspection of Brake Fluid Level
- Visual inspection of brake device
- Inspection of brake caliper guide pin
- Inspection of Brake Pedal and EPB Switch
- Inspection of high-voltage battery SOC
- Inspection of High-Voltage Battery
- Maintenance and charging of high-voltage battery
- Visual Inspection of Lower Control Arm Ball Stud Dust Cover and Rubber Support
- Visual Inspection of Tie Rod Dust Cover and Stabilizer Bar Rubber Support
- Visual Inspection of Coil Spring and Damping Components
- Visual inspection of CV joint universal joint dust cover
- Inspection of Steering Link Ball Pin
- Inspection of lower control arm ball stud and stabilizer bar tie rod ball joint
- Inspection of Chassis Fixing Bolts and Nuts
- Visual inspection of chassis protection
- Inspection of Test Drive Items
- Replacement of coolant
- Replacement of Brake Fluid
- Replacement of Gear Oil
- Power
- High Voltage System
- Power Battery
- Precautions
- System Description
- Specifications
- Power Battery Assembly - Removal and Installation
- Battery Pack Sound Insulation Pad Assembly - Removal and Installation
- Ground Wiring Harness of Battery Pack - Removal and Installation
- Inspection of Power Battery Assembly
- Calibration of standard mileage condition
- Front Drive Electric Assembly
- Precautions
- System Description
- Specifications
- Integrated Intelligent Front Drive Assembly - Removal and Installation
- Front Drive Motor + Transmission Assembly Maintenance Kit - Removal and Installation
- Drive Motor Control Assembly Maintenance Kit - Removal and Installation
- Fuse - Removal and Installation
- Left Differential Oil Seal - Removal and Installation
- Right Differential Oil Seal - Removal and Installation
- Replacement of Differential Gear Oil
- Ground Wiring Harness of Front Motor Assembly - Removal and Installation
- Ground Wiring Harness of Main Motor Control Module Housing - Removal and Installation
- Front Drive Electric Assembly Package III - Removal and Installation
- Front Drive Electric Assembly Package II - Removal and Installation
- Front Drive Electric Powertrain Package I - Removal and Installation
- Motor Zero Calibration of Integrated Intelligent Front Drive Assembly
- Anti-Theft Matching of Drive Motor Control Module Assembly
- Camber Calibration of Drive Motor Control Module Assembly
- Cruise Configuration Calibration of Drive Motor Control Module Assembly
- VIN Write Calibration of Drive Motor Control Module Assembly
- Calibration of VTOL Discharge Function
- High Voltage Wiring Harness
- Precautions
- System Description
- Specifications
- High Voltage Distribution Wiring Harness Sub-assembly - Removal and Installation
- Integrated AC/DC charging vehicle socket sub-assembly
- Precautions
- System Description
- Specifications
- Integrated AC/DC Charging Vehicle Socket Sub-Assembly - Removal and Installation
- CCS Communication Converter - Removal and Installation
- Thermal Management System
- Cooling System
- Precautions
- System Description
- Specifications
- Motor Radiator Assembly I - Removal and Installation
- Electronic Fan Assembly I - Removal and Installation
- Radiator Upper Mount Bracket I - Removal and Installation
- Radiator Upper Mount Bushing - Removal and Installation
- Radiator Lower Mount Bushing Assembly - Removal and Installation
- Expansion Tank Bracket Assembly - Removal and Installation
- Expansion Tank Assembly I - Removal and Installation
- Expansion Tank Positioning Rubber Sleeve - Removal and Installation
- Cooling Pipe Assembly 1 - Removal and Installation
- Cooling Pipe Assembly 2 - Removal and Installation
- Cooling Pipe Assembly 3 - Removal and Installation
- Cooling Pipe Assembly 4 - Removal and Installation
- Cooling Pipe Assembly 5 - Removal and Installation
- Cooling Water Pipe Assembly - Removal and Installation
- Inlet T-Pipe - Removal and Installation
- Box Outlet Pipe - Removal and Installation
- Electric Water Pump Assembly I - Removal and Installation
- Replacement of Coolant
- Expansion Tank Cover Testing
- Expansion Tank Testing
- Acceleration System
- Acceleration Control Mechanism
- Precautions
- System Description
- Specifications
- Accelerator Pedal Assembly - Removal and Installation
- Accelerator Pedal Bracket Assembly - Removal and Installation
- Adjustment of Accelerator Pedal
- Shift Control Mechanism
- Precautions
- System Description
- Specifications
- Shift Lever Assembly - Removal and Installation
- Shift Control Mechanism Panel Assembly - Removal and Installation
- Shift Control Mechanism Assembly - Removal and Installation
- Power Accessories
- Powertrain Mount
- Precautions
- System Description
- Specifications
- Powertrain Rear Mount Bracket Mass Block - Removal and Installation
- Powertrain Right Mount Support Assembly - Removal and Installation
- Powertrain Right Mount Bracket Assembly - Removal and Installation
- Powertrain Left Mount Support Assembly - Removal and Installation
- Powertrain Rear Mount Bracket Assembly - Removal and Installation
- Powertrain Rear Mount Support Assembly - Removal and Installation
- Chassis
- Suspension System
- Front Suspension
- Precautions
- System Description
- Specifications
- Front Subframe and Power Assembly - Removal and Installation
- Front Subframe Assembly - Removal and Installation
- Right Pressing Plate of Front Stabilizer Bar - Removal and Installation
- Left Pressing Plate of Front Stabilizer Bar - Removal and Installation
- Stabilizer Bar Tie Rod and Ball Joint Assembly - Removal and Installation
- Front Stabilizer Bar Fitting Assembly - Removal and Installation
- Front Stabilizer Bar & Bushing - Removal and Installation
- Left Front Shock Absorber Strut Assembly - Removal and Installation
- Right Front Shock Absorber Strut Assembly - Removal and Installation
- Removal of Front Shock Absorber Strut Assembly
- Left Front Lower Swing Arm Assembly - Removal and Installation
- Right Front Lower Swing Arm Assembly - Removal and Installation
- Ball Stud Press Assembly - Removal and Installation
- Front Subframe Rear Crash Bar - Removal and Installation
- Four-Wheel Alignment
- Rear Suspension
- Precautions
- System Description
- Specifications
- Left Rear Steering Knuckle - Removal and Installation
- Rear Right Steering Knuckle Assembly - Removal and Installation
- Shock Absorber Lower Mounting Bushing - Removal and Installation
- Outer Bushing of Lower Swing Arm - Removal and Installation
- Rear Shock Absorber Assembly - Removal and Installation
- Removal of Rear Shock Absorber Assembly
- Rear Stabilizer Bar Tie Rod and Ball Joint Assembly - Removal and Installation
- Rear Stabilizer Bar Fitting Assembly - Removal and Installation
- Left Front Rubber Bushing Assembly of Rear Subframe - Removal and Installation
- Rear Suspension Lower Arm Assembly - Removal and Installation
- Rear Coil Spring - Removal and Installation
- Upper Cushion of Rear Coil Spring - Removal and Installation
- Lower Cushion of Rear Coil Spring - Removal and Installation
- Rear Suspension Upper Left Arm Assembly - Removal and Installation
- Rear Suspension Control Arm Assembly - Removal and Installation
- Rear Suspension Left Towing Arm Assembly - Removal and Installation
- Rear Suspension Right Towing Arm Assembly - Removal and Installation
- Left Rear Towing Arm Mounting Bracket - Removal and Installation
- Right Rear Towing Arm Mounting Bracket - Removal and Installation
- Rear Subframe Assembly - Removal and Installation
- Drive System
- Transmission Shaft
- Precautions
- System Description
- Specifications
- Left Front Drive Half Shaft Assembly - Removal and Installation
- Right Front Drive Half Shaft Assembly - Removal and Installation
- Wheel System
- Precautions
- System Description
- Specifications
- Wheel Assembly - Removal and Installation
- Wheel Center Cover Assembly - Removal and Installation
- Radial Tire - Removal and Installation
- Aluminum Alloy Wheel - Removal and Installation
- Wheel changing
- Detection of Wheel Runout
- Brake System
- Integrated Power Brake System
- Precautions
- System Description
- Specifications
- IPB System Assembly - Removal and Installation
- Yaw Rate Sensor - Removal and Installation
- Left Front Wheel Speed Sensor - Removal and Installation
- Right Front Wheel Speed Sensor - Removal and Installation
- Rear Left Wheel Speed Sensor - Removal and Installation
- Right Rear Wheel Speed Sensor - Removal and Installation
- Right Front Brake Tube Assembly - Removal and Installation
- Left Front Brake Tube Assembly - Removal and Installation
- Left Rear Brake Tube I Assembly - Removal and Installation
- Right Rear Brake Tube I Assembly - Removal and Installation
- Left Rear Brake Tube II Assembly - Removal and Installation
- Right Rear Brake Tube II Assembly - Removal and Installation
- Brake Fluid Reservoir Connecting Hose Assembly - Removal and Installation
- Brake Fluid Reservoir Mounting Bracket Assembly - Removal and Installation
- Brake Fluid Reservoir Assembly - Removal and Installation
- Left Front Brake Hose Assembly - Removal and Installation
- Right Front Brake Hose Assembly - Removal and Installation
- Left Rear Brake Hose Assembly - Removal and Installation
- Right Rear Brake Hose Assembly - Removal and Installation
- Air Discharge of Braking System
- Handling of IPB System Assembly
- Installation Mode of Intelligent Power Braking System
- Intelligent Power Braking System Model Configuration Write and Sensor Calibration
- Yaw Rate Sensor Calibration
- Replacement of Brake Fluid
- Parking Brake System
- Precautions
- System Description
- Specifications
- Integrated EPB Control Module Assembly - Removal and Installation
- Wheeled EPB Motor Drive Assembly - Removal and Installation
- EPB Applied and Released for Repair
- Front Brake
- Precautions
- System Description
- Specifications
- Front Brake Disc - Removal and Installation
- Left Front Steering Knuckle - Removal and Installation
- Right Front Steering Knuckle - Removal and Installation
- Front Hub Unit Assembly - Removal and Installation
- Left Front Brake Mudguard - Removal and Installation
- Right Front Brake Mudguard - Removal and Installation
- Left Front Brake Caliper Body Sub-Assembly - Removal and Installation
- Right Front Brake Caliper Body Sub-Assembly - Removal and Installation
- Front Brake Pad Assembly - Removal and Installation
- Left Front Bracket Assembly - Removal and Installation
- Right Front Bracket Assembly - Removal and Installation
- Front Brake Pin and Lock Bolt Assembly - Removal and Installation
- Brake Pad Holder - Removal and Installation
- Inspection of Brake pads
- Detection of Brake Disc
- Axial Clearance Checking of Wheel Bearing
- Rear Brake
- Precautions
- System Description
- Specifications
- Rear Brake Pad Assembly Aftersales Package - Removal and Installation
- Rear Hub Unit Assembly - Removal and Installation
- Rear Brake Disc - Removal and Installation
- Left Rear Brake Mudguard - Removal and Installation
- Right Rear Brake Mudguard - Removal and Installation
- Left Rear Bracket Assembly Aftersales Package - Removal and Installation
- Right Rear Bracket Assembly Aftersales Package - Removal and Installation
- Left Rear Brake Caliper Sub-Assembly Aftersales Package - Removal and Installation
- Right Rear Brake Caliper Sub-Assembly Aftersales Package - Removal and Installation
- Guide Pin Aftersales Package - Removal and Installation
- Inspection of Rear Brake Pad
- Inspection of Rear Brake Disc
- Inspection of Hub Bearing Axial Clearance
- Brake Pedal
- Precautions
- System Description
- Specifications
- Brake Light Switch - Removal and Installation
- Brake Pedal Assembly - Removal and Installation
- Bracket On Brake Pedal - Removal and Installation
- Adjustment of the Brake Pedal and the Brake Light Switch
- Steering System
- Precautions
- System Description
- Specifications
- Steering Wheel Assembly - Removal and Installation
- Electric Power Steering Column and Universal Joint Assembly - Removal and Installation
- Mechanical Steering Gear with Tie Rod Assembly - Removal and Installation
- Check of Free Travel of Steering Wheel
- Steering Angle Signal Calibration
- Inspection of Free Clearance of Steering Wheel
- Inspection of the steering tie rod
- Inspection of EPS
- Tire Rotation
- Inspection and adjustment of four-wheel alignment
- Interior and Exterior Trim
- Bumpers
- Front Bumper
- Precautions
- System Description
- Specifications
- Front Bumper Assembly - Removal and Installation
- Front Bumper Grille Trim - Removal and Installation
- Upper Mounting Bracket of Front Bumper - Removal and Installation
- Front Bumper Left Bracket - Removal and Installation
- Front Bumper Right Bracket - Removal and Installation
- Logo Trim on the Upper Part of Front Bumper - Removal and Installation
- Left Air Inlet I of Front Bumper - Removal and Installation
- Left Air Inlet II of Front Bumper - Removal and Installation
- Right Air Inlet I of Front Bumper - Removal and Installation
- Right Air Inlet II of Front Bumper - Removal and Installation
- Camera Cover - Removal and Installation
- Front Bumper Middle Trim - Removal and Installation
- Left Trim Cover of Front Bumper - Removal and Installation
- Right Trim Cover of Front Bumper - Removal and Installation
- Front Bumper Lower Trim - Removal and Installation
- Front Bumper Lower Body Kit Trim - Removal and Installation
- Front Bumper Lower Body - Removal and Installation
- Front Bumper Body - Removal and Installation
- Rear Bumper
- Precautions
- System Description
- Specifications
- Rear Bumper Assembly - Removal and Installation
- Rear Bumper Body Assembly - Removal and Installation
- Rear Bumper Left Front Bracket Assembly - Removal and Installation
- Rear Bumper Right Front Bracket Assembly - Removal and Installation
- Rear Bumper Left Rear Bracket Assembly - Removal and Installation
- Rear Bumper Right Rear Bracket Assembly - Removal and Installation
- Rear Bumper Lower Left Support Bracket Assembly - Removal and Installation
- Rear Bumper Lower Right Support Bracket Assembly - Removal and Installation
- Rear Vent Assembly - Removal and Installation
- Rear Bumper Left Trim - Removal and Installation
- Rear Bumper Right Trim - Removal and Installation
- Rear Bumper Left Return Trim - Removal and Installation
- Rear Bumper Right Return Trim - Removal and Installation
- Rear Bumper Trim - Removal and Installation
- Rear Bumper Lower Body Kit Trim - Removal and Installation
- Instrument Panel System
- Instrument Panel
- Precautions
- System Description
- Specifications
- PAD Upper Cover Assembly - Removal and Installation
- Combination Switch Upper Guard Assembly - Removal and Installation
- Combination Switch Lower Guard Plate - Removal and Installation
- PAD Mounting Base Guard Assembly - Removal and Installation
- Lower Fixing Plate of PAD Mounting Base Guard - Removal and Installation
- PAD Guard Upper Support Plate Assembly - Removal and Installation
- Instrument Panel Left Trim Panel Assembly - Removal and Installation
- Instrument Panel Right Trim Panel Assembly - Removal and Installation
- Left Shield Assembly of Instrument Panel - Removal and Installation
- Instrument Panel Left End Guard Assembly (with PAB switch)- Removal and Installation
- Instrument Panel Right End Guard Assembly - Removal and Installation
- Instrument Panel Left Lower Guard Assembly - Removal and Installation
- Instrument Panel Right Lower Guard Assembly - Removal and Installation
- Instrument Panel Lower Left Sound Absorbing Baffle Assembly - Removal and Installation
- Glove Box Assembly - Removal and Installation
- Instrument Panel Left Trim Panel Assembly - Removal and Installation
- Instrument Panel Right Trim Panel Assembly - Removal and Installation
- Instrument Panel Upper Body Assembly - Removal and Installation
- Instrument Panel Lower Body Assembly - Removal and Installation
- Left Strut Assembly - Removal and Installation
- Right Strut Assembly - Removal and Installation
- Pipe Beam Welding Assembly - Removal and Installation
- Console
- Precautions
- System Description
- Specifications
- Console Upper Left Trim Panel - Removal and Installation
- Console Upper Right Trim Panel - Removal and Installation
- Console Left Front Guard Assembly - Removal and Installation
- Console Right Front Guard Assembly - Removal and Installation
- Console Mobile Phone Slot - Removal and Installation
- Armrest Box Spacer - Removal and Installation
- Shift Control Mechanism Cover Assembly - Removal and Installation
- Console Rear Trim Panel Assembly - Removal and Installation
- USB Mounting Panel - Removal and Installation
- Rear Cover of Console Armrest Box - Removal and Installation
- Console Body Assembly - Removal and Installation
- Console Middle Mounting Bracket Assembly - Removal and Installation
- Console Rear Mounting Bracket Assembly - Removal and Installation
- Rearview Mirror
- Precautions
- System Description
- Specifications
- Inside Rearview Mirror Assembly - Removal and Installation
- Left Outside Rearview Mirror Assembly - Removal and Installation
- Right Outside Rearview Mirror Assembly - Removal and Installation
- Outside Rearview Mirror Right Holder Assembly - Removal and Installation
- Right Blind Spot Warning Light Assembly - Removal and Installation
- Right Commutator - Removal and Installation
- Seat
- Driver Seat
- Precautions
- System Description
- Specifications
- Driver Seat Assembly - Removal and Installation
- Driver Seat Six-way Adjustment Button - Removal and Installation
- Driver Seat Two-way Adjustment Button - Removal and Installation
- Driver Seat Right Guard - Removal and Installation
- Driver Seat Electric Adjustment Switch Body - Removal and Installation
- Driver Seat Left Side Guard - Removal and Installation
- Plastic Part 2 at Headrest - Removal and Installation
- Front Passenger Seat
- Precautions
- System Description
- Specifications
- Front Passenger Seat Assembly - Removal and Installation
- Front Passenger Four-way Adjustment Button - Removal and Installation
- Front Passenger Two-way Adjustment Button - Removal and Installation
- Electric Front Passenger Seat Adjustment Switch Body - Removal and Installation
- Front Passenger Seat Right Guard - Removal and Installation
- Front Passenger Seat Left Guard - Removal and Installation
- Rear Seat
- Precautions
- System Description
- Specifications
- Left Rear Seat Cushion Assembly - Removal and Installation
- Right Rear Backrest Assembly - Removal and Installation
- Left Rear Backrest Assembly - Removal and Installation
- Rear Backrest Bracket - Removal and Installation
- Rear Headrest Assembly - Removal and Installation
- Rear Center Seat Headrest Assembly - Removal and Installation
- Sliding Sleeve Assembly of Rear Seat Headrest Height Adjustment - Removal and Installation
- Rear Headrest Slide Cover Components - Removal and Installation
- Webbing Plastic Guard - Removal and Installation
- Seat Belt Outlet Cover - Removal and Installation
- Rear Seat Middle Armrest Cup - Removal and Installation
- Armrest Right Fixing Cover Panel - Removal and Installation
- Rear Seat Center Armrest Assembly - Removal and Installation
- Fixed Sheet Metal Cover on the Right Side of the Armrest - Removal and Installation
- Unlocking Webbing of Left Rear Backrest - Removal and Installation
- Left Rear Sheet Metal Bracket - Removal and Installation
- Left Lock Assembly - Removal and Installation
- Right Rear Sheet Metal Bracket - Removal and Installation
- Unlocking Webbing of Right Rear Backrest - Removal and Installation
- Right Lock Assembly - Removal and Installation
- Rear Seat Support Plate Assembly -Removal and Installation
- Seat Belt
- Precautions
- System Description
- Specifications
- Left Front Seat Belt Buckle Assembly - Removal and Installation
- Right Front Seat Belt Buckle Assembly - Removal and Installation
- Left Front Seat Belt Assembly - Removal and Installation
- Right Front Seat Belt Assembly - Removal and Installation
- Seat Belt Height Adjuster Assembly - Removal and Installation
- Left Rear Seat Belt Assembly - Removal and Installation
- Right Rear Seat Belt Assembly - Removal and Installation
- Rear Middle Three-point Seat Belt Assembly - Removal and Installation
- Right Rear Seat Belt Buckle Assembly - Removal and Installation
- Left Rear Seat Belt Buckle Assembly - Removal and Installation
- Left connecting parts pretightening -Removal and Installation
- Right connecting parts pretightening -Removal and Installation
- Door Trim
- Front Door Trim
- Precautions
- System Description
- Specifications
- Left Front Door Corner Guard Assembly - Removal and Installation
- Left Front Door Guard Assembly - Removal and Installation
- Front Left Window Control Panel Assembly - Removal and Installation
- Left Front Door Handle Box Cover Removal and Installation
- Right Front Door Corner Guard Assembly - Removal and Installation
- Right Front Door Guard Assembly - Removal and Installation
- Front Right Window Control Panel Assembly - Removal and Installation
- Right Front Door Handle Box Cover Plate- Removal and Installation
- Rear Door Trim
- Precautions
- System Description
- Specifications
- Left Rear Door Handle Box Cover Plate - Removal and Installation
- Left Rear Window Control Panel Assembly - Removal and Installation
- Left Rear Door Guard Assembly - Removal and Installation
- Right Rear Door Handle Box Cover - Removal and Installation
- Rear Right Window Control Panel Assembly - Removal and Installation
- Right Rear Door Guard Assembly - Removal and Installation
- Tailgate trim
- Precautions
- System Description
- Specifications
- Spoiler Assembly - Removal and Installation
- Spoiler Left Trim Panel Assembly - Removal and Installation
- Spoiler Right Trim Panel Assembly - Removal and Installation
- Tailgate Upper Guard Assembly - Removal and Installation
- Tailgate Left Guard Assembly - Removal and Installation
- Tailgate Right Guard Assembly - Removal and Installation
- Tailgate Snap Handle Box Assembly - Removal and Installation
- Tailgate Lower Guard Assembly - Removal and Installation
- Rear License Plate Trim Body Assembly - Removal and Installation
- BuildYourDreams Word Mark Assembly - Removal and Installation
- Front Compartment Trim
- Precautions
- System Description
- Specifications
- Grille Upper Cover Assembly - Removal and Installation
- Front Compartment Left Trim Panel Assembly - Removal and Installation
- Front Compartment Right Trim Panel Assembly - Removal and Installation
- Left Fender Corner Trim Assembly - Removal and Installation
- Right Fender Corner Trim Assembly - Removal and Installation
- Totally Enclosed Deflector Assembly - Removal and Installation
- Ventilation Cover Assembly - Removal and Installation
- Side Wall Interior and Exterior Trim
- Precautions
- System Description
- Specifications
- Left Front Door Frame Seal - Removal and Installation
- Right Front Door Frame Weather Strip - Removal and Installation
- Left Rear Door Frame Seal - Removal and Installation
- Right Rear Door Frame Weather Strip - Removal and Installation
- Left A-Pillar Upper Guard Assembly - Removal and Installation
- Right A-Pillar Upper Guard Assembly - Removal and Installation
- Left Front Door Sill Guard Assembly - Removal and Installation
- Right Front Door Sill Guard Assembly - Removal and Installation
- Left Rear Door Sill Guard Assembly - Removal and Installation
- Right Rear Door Sill Guard Assembly - Removal and Installation
- Left B-Pillar Lower Guard Assembly - Removal and Installation
- Right B-Pillar Lower Guard Assembly - Removal and Installation
- Left B-Pillar Upper Guard Assembly - Removal and Installation
- Right B-Pillar Upper Guard Assembly - Removal and Installation
- Trunk Lid Front End Support Plate Assembly - Removal and Installation
- Left Rear Side Wall Guard Assembly - Removal and Installation
- Right Rear Side Wall Guard Assembly - Removal and Installation
- Left C-Pillar Upper Guard Assembly - Removal and Installation
- Right C-Pillar Upper Guard Assembly - Removal and Installation
- Left Fender Trim Strip Assembly - Removal and Installation
- Right Fender Trim Strip Assembly - Removal and Installation
- Left Front B-Pillar Exterior Trim Panel Assembly - Removal and Installation
- Left Rear B-Pillar Exterior Trim Panel Assembly - Removal and Installation
- Left C-Pillar Exterior Trim Panel Assembly - Removal and Installation
- Right Front B-Pillar Exterior Trim Panel Assembly - Removal and Installation
- Right Rear B-Pillar Exterior Trim Panel Assembly - Removal and Installation
- Right C-Pillar Exterior Trim Panel Assembly - Removal and Installation
- Left Front Door Skirt Panel Assembly - Removal and Installation
- Right Front Door Skirt Panel Assembly - Removal and Installation
- Left Rear Door Skirt Panel Assembly - Removal and Installation
- Right Rear Door Skirt Panel Assembly - Removal and Installation
- Left Front Wheel Eyebrow Trim Panel Assembly - Removal and Installation
- Right Front Wheel Eyebrow Trim Panel Assembly - Removal and Installation
- Left Rear Wheel Eyebrow Trim Panel Assembly - Removal and Installation
- Right Rear Wheel Eyebrow Trim Panel Assembly - Removal and Installation
- AC/DC Charging Port Cover Assembly - Removal and Installation
- Mudguard
- Precautions
- System Description
- Specifications
- Left Front Wheel Mudguard Assembly - Removal and Installation
- Right Front Wheel Mudguard Assembly - Removal and Installation
- Left Rear Wheel Mudguard Assembly - Removal and Installation
- Right Rear Wheel Mudguard Assembly - Removal and Installation
- Front Motor Lower Mudguard Assembly - Removal and Installation
- Rear Floor Mudguard - Removal and Installation
- Rear Floor Left Mudguard - Removal and Installation
- Rear Floor Right Mudguard - Removal and Installation
- Lower Mudguard Bracket Assembly - Removal and Installation
- Rear Floor Mudguard Bracket Assembly - Removal and Installation
- Rear Wall Trim
- Precautions
- System Description
- Specifications
- Tailgate Frame Seal - Removal and Installation
- Shelf Assembly - Removal and Installation
- Trunk Lid Assembly - Removal and Installation
- Tool Box in the Middle of the Trunk - Removal and Installation
- Trunk Floor Sound Insulation Pad - Removal and Installation
- Rear Wall Step Assembly - Removal and Installation
- Left Rear Wheel House Sound Insulation Pad - Removal and Installation
- Right Rear Wheel House Sound Insulation Pad - Removal and Installation
- Ceiling Trim
- Precautions
- System Description
- Specifications
- Left Sun Visor Assembly - Removal and Installation
- Right Sun Visor Assembly - Removal and Installation
- Sun Visor Hold-Down Support - Removal and Installation
- Roof Handle Assembly - Removal and Installation
- Ceiling Assembly - Removal and Installation
- Front Safety Hand Grab Bracket - Removal and Installation
- Carpet
- Precautions
- System Description
- Carpet Assembly - Removal and Installation
- Insulation
- Precautions
- System Description
- Front Compartment Thermal Insulation - Removal and Installation
- Front Compartment Cover Insulation - Removal and Installation
- Carpet Insulation Assembly - Removal and Installation
- Front Wall Thermal Insulation Assembly - Removal and Installation
- Flow Tank Insulation - Removal and Installation
- Body
- Fender
- Precautions
- System Description
- Specifications
- Left Rear Fender Bracket - Removal and Installation
- Left Front Fender Bracket - Removal and Installation
- Upper Mounting Bracket of Left Fender - Removal and Installation
- Left Fender Assembly - Removal and Installation
- Right Rear Fender Bracket - Removal and Installation
- Right Front Fender Bracket - Removal and Installation
- Upper Mounting Bracket of Right Fender - Removal and Installation
- Right Fender Assembly - Removal and Installation
- Bumper Beam
- Precautions
- System Description
- Specifications
- Rear Bumper Beam - Removal and Installation
- Trailer Hitch Assembly - Removal and Installation
- Front Bumper Beam Assembly - Removal and Installation
- Auxiliary Bumper Beam Left Mounting Bracket -Removal and Installation
- Auxiliary Bumper Beam Right Mounting Bracket -Removal and Installation
- Windshield
- Precautions
- System Description
- Front Windshield Assembly - Removal and Installation
- Tailgate Glass Assembly - Removal and Installation
- Left Rear Side Wall Glass Assembly - Removal and Installation
- Right Rear Side Wall Glass Assembly - Removal and Installation
- Wiper and Washer
- Precautions
- System Description
- Specifications
- Front Wiper Left Wiper Blade Assembly - Removal and Installation
- Front Wiper Right Blade Assembly - Removal and Installation
- Front Wiper Left Wiper Arm Assembly - Removal and Installation
- Front Wiper Drive System Assembly - Removal and Installation
- Front Wiper Right Wiper Arm Assembly - Removal and Installation
- Washer Reservoir and Motor Assembly - Removal and Installation
- Washer Reservoir Neck Assembly - Removal and Installation
- Front Wash Line Sub-assembly I - Removal and Installation
- Front Wash Line and Nozzle Assembly I - Removal and Installation
- Front Wash Line and Nozzle Assembly II - Removal and Installation
- Rear Washing Nozzle Assembly - Removal and Installation
- Rear Washing Line Sub-assembly IV - Removal and Installation
- Rear Wiper Arm and Blade Assembly - Removal and Installation
- Rear Wiper Motor and Bracket Assembly - Removal and Installation
- Rear Wash Line Sub-assembly I - Removal and Installation
- Rear Wash Line Sub-assembly II - Removal and Installation
- Rear Wash Line Sub-assembly III - Removal and Installation
- Doors
- Front Compartment Cover
- Precautions
- System Description
- Specifications
- Front Compartment Seal - Removal and Installation
- Front Compartment Buffer Block - Removal and Installation
- Front Compartment Cover Strut Assembly - Removal and Installation
- Front Compartment Cover Strut Jacket - Removal and Installation
- Front Compartment Cover Strut Holder Component - Removal and Installation
- Front Compartment Cover Lock Body Assembly - Removal and Installation
- Front Compartment Cover Lock Bracket - Removal and Installation
- Front Compartment Cover Opening Handle Assembly - Removal and Installation
- Front Compartment Cover Opening Cable Assembly - Removal and Installation
- Left Connecting Plate of Upper Beam of Water Tank - Removal and Installation
- Water Tank Upper Beam Right Connecting Plate Assembly - Removal and Installation
- Ventilation Cover Seal - Removal and Installation
- Front Compartment Assembly - Removal and Installation
- Left Hinge of Front Compartment Cover - Removal and Installation
- Right Hinge of Front Compartment Cover - Removal and Installation
- Front Module Assembly - Removal and Installation
- Front Flow Tank Assembly - Removal and Installation
- Front Compartment Cover Lock Ring - Removal and Installation
- Adjustment of Front Compartment Cover Assembly
- Inspection of Front compartment cover lock body assembly
- Front Door
- Precautions
- System Description
- Specifications
- Left Front Door Weather Strip - Removal and Installation
- Left Front Door Outer Handle Assembly - Removal and Installation
- Left Front Door Movable Guide Rail and Mud Tank Assembly - Removal and Installation
- Left Front Door Sill Weather Strip - Removal and Installation
- Left Front Door Glass Assembly - Removal and Installation
- Left Front Door Outer Waist Belt - Removal and Installation
- Left Front Door Inner Waist Belt - Removal and Installation
- Left Front Door Window Mud Tank Assembly - Removal and Installation
- Left Front Door Sealing Plug I - Removal and Installation
- Left Front Door Sealing Plug II - Removal and Installation
- Left Front Door Assembly - Removal and Installation
- Left Front Door Upper Hinge Assembly - Removal and Installation
- Left Front Door Lower Hinge Assembly - Removal and Installation
- Front Door Limit Block - Removal and Installation
- Right Front Door Outer Handle Assembly - Removal and Installation
- Front Door Stopper Assembly - Removal and Installation
- Right Front Door Movable Guide Rail and Mud Tank Assembly - Removal and Installation
- Right Front Door Weather Strip - Removal and Installation
- Right Front Door Sill Weather Strip - Removal and Installation
- Right Front Door Window Mud Tank Assembly - Removal and Installation
- Right Front Door Glass Assembly - Removal and Installation
- Right Front Door Outer Waist Belt - Removal and Installation
- Right Front Door Inner Waist Belt - Removal and Installation
- Right Front Door Sealing Plug I - Removal and Installation
- Right Front Door Sealing Plug II - Removal and Installation
- Right Front Door Assembly - Removal and Installation
- Right Front Door Upper Hinge Assembly - Removal and Installation
- Right Front Door Lower Hinge Assembly - Removal and Installation
- Adjustment of Front Door Assembly
- Rear Door
- Precautions
- System Description
- Specifications
- Left Rear Door Weather Strip - Removal and Installation
- Left Rear Door Sill Weather Strip - Removal and Installation
- Left Rear Door Glass Assembly - Removal and Installation
- Left Rear Door Window Mud Tank Assembly - Removal and Installation
- Left Rear Door Outer Waist Belt - Removal and Installation
- Left Rear Door Inner Waist Belt - Removal and Installation
- Left Rear Door Sealing Plug I - Removal and Installation
- Left Rear Door Sealing Plug II - Removal and Installation
- Left Rear Door Outer Handle Assembly - Removal and Installation
- Left Rear Door Front Movable Guide Rail and Mud Tank Assembly - Removal and Installation
- Left Rear Door Rear Movable Guide Rail and Mud Tank Assembly - Removal and Installation
- Left Rear Door Upper Hinge Assembly - Removal and Installation
- Left Rear Door Lower Hinge Assembly - Removal and Installation
- Left Rear Door Assembly - Removal and Installation
- Rear Door Stopper Assembly - Removal and Installation
- Right Rear Door Weather Strip - Removal and Installation
- Right Rear Door Sill Weather Strip - Removal and Installation
- Right Rear Door Glass Assembly - Removal and Installation
- Right Rear Door Window Mud Tank Assembly - Removal and Installation
- Right Rear Door Outer Waist Belt - Removal and Installation
- Right Rear Door Inner Waist Belt - Removal and Installation
- Right Rear Door Sealing Plug I - Removal and Installation
- Right Rear Door Sealing Plug II - Removal and Installation
- Rear Door Limit Block - Removal and Installation
- Right Rear Door Outer Handle Assembly - Removal and Installation
- Right Rear Door Front Movable Guide Rail and Mud Tank Assembly - Removal and Installation
- Right Rear Door Rear Movable Guide Rail and Mud Tank Assembly - Removal and Installation
- Right Rear Door Upper Hinge Assembly - Removal and Installation
- Right Rear Door Lower Hinge Assembly - Removal and Installation
- Right Rear Door Assembly - Removal and Installation
- Adjustment of Rear Door Assembly
- Tailgate
- Precautions
- System Description
- Specifications
- Tailgate Lock Ring Access Cover - Removal and Installation
- Tailgate Left Air Spring - Removal and Installation
- Tailgate Left Air Spring Body Bracket - Removal and Installation
- Tailgate Left Gas Spring Door Bracket - Removal and Installation
- Tailgate Hinge Assembly - Removal and Installation
- Tailgate Limit Block - Removal and Installation
- Tailgate Lower Buffer Block - Removal and Installation
- Tailgate Assembly - Removal and Installation
- Adjustment of liftgate assembly
- Sunroof System
- Precautions
- System Description
- Specifications
- Left Front Water Pipe Assembly - Removal and Installation
- Right Front Water Pipe Components - Removal and Installation
- Left Rear Water Pipe Assembly - Removal and Installation
- Right Rear Water Pipe Components - Removal and Installation
- Sunroof Blinder Motor - Removal and Installation
- Rear Blinder Motor - Removal and Installation
- Sunroof Assembly - Removal and Installation
- Body Weather Strip - Removal and Installation
- Front Glass Assembly - Removal and Installation
- Rear Glass Assembly - Removal and Installation
- Left Luggage Rack Components - Removal and Installation
- Right Luggage Rack Components - Removal and Installation
- Sunroof Seal- Removal and Installation
- Removal of Sunroof Assembly
- Electrical
- Safety and Protection System
- Supplemental Restraint System
- Precautions
- System Description
- Specifications
- Driver Airbag Module - Removal and Installation
- Front Passenger Airbag Module - Removal and Installation
- Right Front Seat Side Airbag Module -Removal and Installation
- Front Seat Far-end Right Airbag Module- Removal and Installation
- SRS Electronic Control Unit - Removal and Installation
- Front Impact Sensor I - Removal and Installation
- Side Impact Sensor - Removal and Installation
- Pressure-type Impact Sensor -Removal and Installation
- Left Curtain Airbag Module - Removal and Installation
- Left B-Pillar Guide Bracket - Removal and Installation
- Left C-Pillar Guide Bracket - Removal and Installation
- Right Curtain Airbag Module - Removal and Installation
- Right B-Pillar Guide Bracket - Removal and Installation
- Right C-Pillar Guide Bracket - Removal and Installation
- PAB Switch - Removal and Installation
- Entry and Anti-theft System
- Central Locking System
- System Description
- Specifications
- Vehicle Lock Cylinder Key Assembly - Removal and Installation
- Left Front Door Lock Body Assembly - Removal and Installation
- Right Front Door Lock Body Assembly - Removal and Installation
- Left Rear Door Lock Body Assembly - Removal and Installation
- Right Rear Door Lock Body Assembly - Removal and Installation
- Tailgate Lock Cover - Removal and Installation
- Tailgate Lock Body Assembly - Removal and Installation
- Tailgate Lock Ring Assembly - Removal and Installation
- Side Door Lock Ring Assembly - Removal and Installation
- Smart Key System
- Precautions
- System Description
- Specifications
- High Frequency Receiver Module of the Key - Removal and Installation
- Interior Detection Antenna Assembly (Instrument Panel) - Removal and Installation
- Interior Detection Antenna Assembly (Rear Mounting Bracket of Console) - Removal and Installation
- Interior Detection Antenna Assembly (Rear Seat) - Removal and Installation
- Interior Detection Antenna Assembly (on Rear Bumper Beam) - Removal and Installation
- Intelligent Access Control Module -Removal and Installation
- Low Voltage Power and Distribution
- Low Voltage Battery
- Precautions
- System Description
- Specifications
- Battery Assembly - Removal and Installation
- Battery Pressing Plate - Removal and Installation
- Rubber Gasket of Iron Battery - Removal and Installation
- Upper Bracket of Battery - Removal and Installation
- Lower Bracket of Battery - Removal and Installation
- Distribution Box
- Precautions
- System Description
- Specifications
- Front Compartment Distribution Box Body - Removal and Installation
- Front Compartment Distribution Box Lower Bracket - Removal and Installation
- Power Distribution Box Bracket I - Removal and Installation
- Backup Power and Cigarette Lighter
- Precautions
- System Description
- USB Charging Connector - Removal and Installation
- USB Interface Assembly - Removal and Installation
- Backup Power - Removal and Installation
- Wireless Charging
- Precautions
- System Description
- Wireless Charging Module - Removal and Installation
- Instrumentation and Warning Systems
- Instrument Panel Cluster
- System Description
- Instrument Panel Cluster Assembly - Removal and Installation
- Multifunction Display Bracket Assembly - Removal and Installation
- Tire Pressure Monitoring System
- Precautions
- System Description
- Specifications
- Tire Pressure Monitoring Module - Removal and Installation
- Tire Pressure Monitoring Module Matching
- Driver Assistance
- Adaptive Cruise System
- System Description
- Steering Wheel Switch Group - Removal and Installation
- Front Millimeter Wave Radar - Removal and Installation
- Calibration of Front Millimeter Wave Radar (Bosch Optional)
- Calibration of Front Millimeter Wave Radar (Veoneer Optional)
- Lane Departure Warning System
- System Description
- LDW Module Cover II - Removal and Installation
- LDW Module Cover I - Removal and Installation
- Multi-Purpose Camera Assembly - Removal and Installation
- Multifunction video control module Calibration
- Calibration of Multifunction Video Control Module (Veoneer Optional)
- Blind Area Detection System
- Precautions
- System Description
- Left Rear Millimeter Wave Radar - Removal and Installation
- Configuration of Blind Area Detection System
- Park Assist System
- Precautions
- System Description
- Front Small Probe - Removal and Installation
- Rear Small Probe - Removal and Installation
- Panoramic Imaging System
- System Description
- Front-View Camera Assembly - Removal and Installation
- Rear-View Camera Assembly - Removal and Installation
- Digital Video Recorder (DVR) Camera - Removal and Installation
- Comfort and Convenience System
- Memory System
- Precautions
- System Description
- Specifications
- Left Body Control Module - Removal and Installation
- Left Body Control Module Bracket - Removal and Installation
- Right Body Control Module - Removal and Installation
- Right Body Control Module Bracket - Removal and Installation
- Rear Body Control Module - Removal and Installation
- Rear Body Control Module Bracket - Removal and Installation
- Removal and installation of the general domain controller
- Write of Left Body Control Module
- Write of Right Body Control Module
- Smart Electric Tailgate System
- Precautions
- System Description
- Tailgate Right Electric Spring Body - Removal and Installation
- Tailgate Left Balance Bar Body - Removal and Installation
- Electric Tailgate Closing Switch - Removal and Installation
- Electric Tailgate Opening Switch - Removal and Installation
- Trunk Lid Switch - Removal and Installation
- Power Window System
- Precautions
- System Description
- Specifications
- Left Front Window Regulator Bracket Assembly - Removal and Installation
- Left Front Window Regulator Motor - Removal and Installation
- Left Rear Window Regulator Bracket Assembly - Removal and Installation
- Left Rear Window Regulator Motor - Removal and Installation
- Right Front Window Regulator Bracket Assembly - Removal and Installation
- Right Front Window Regulator Motor - Removal and Installation
- Right Rear Window Regulator Bracket Assembly - Removal and Installation
- Right Rear Window Regulator Motor - Removal and Installation
- Front Window Regulator Switch Set - Removal and Installation
- Rear Window Regulator Switch Set - Removal and Installation
- Media Entertainment
- Multimedia System
- Precautions
- System Description
- Specifications
- PAD Display Assembly - Removal and Installation
- Display Bracket Assembly - Removal and Installation
- Bluetooth Module - Removal and Installation
- Bluetooth Module Bracket - Removal and Installation
- 4G WiFi BT Antenna - Removal and Installation
- Front Door Woofer Speaker - Removal and Installation
- Rear Door Woofer - Removal and Installation
- Front Door Tweeter - Removal and Installation
- Rear Door Tweeter - Removal and Installation
- Host Assembly - Removal and Installation
- External Antenna - Removal and Installation
- ECallBOX Assembly - Removal and Installation
- ECall Microphone - Removal and Installation
- ECall4GGPS Antenna - Removal and Installation
- ECall Speaker - Removal and Installation
- SIM Card Reader- Removal and Installation
- External Power Amplifier - Removal and Installation
- DAB Box- Removal and Installation
- Engine sound simulator system
- Precautions
- System Description
- Specifications
- Engine Sound Simulator - Removal and Installation
- Engine Sound Simulator 2 - Removal and Installation
- Horn
- Precautions
- System Description
- Specifications
- Tweeter Snail Horn - Removal and Installation
- Interior Lighting System
- Precautions
- System Description
- Footwell Light (Driver) - Removal and Installation
- Footwell Light (Front Passenger) - Removal and Installation
- Footwell Light (Console) - Removal and Installation
- Storage Box Light - Removal and Installation
- Left Rear Side Interior Light Assembly - Removal and Installation
- Left Door Light (Trunk) - Removal and Installation
- Left Door Light (Door) - Removal and Installation
- Left Door Light (Vanity Mirror Light) - Removal and Installation
- Front Interior Dome Light Assembly - Removal and Installation
- Right Front Door Snap Handle Ambient Light Assembly - Removal and Installation
- Right Rear Door Snap Handle Ambient Light Assembly - Removal and Installation
- Exterior Lighting System
- System Description
- Specifications
- Left Combination Headlight Assembly - Removal and Installation
- Right Combination Headlight Assembly - Removal and Installation
- Front Middle Position Light - Removal and Installation
- Left Combination Rear Light Assembly - Removal and Installation
- Right Combination Rear Light Assembly - Removal and Installation
- Rear Fog Light- Removal and Installation
- Left Rear Retro-reflector - Removal and Installation
- Right Rear Retro-reflector - Removal and Installation
- Left License Plate Light - Removal and Installation
- Charging Port Light - Removal and Installation
- Middle Tail Light - Removal and Installation
- High-mount Stop Light - Removal and Installation
- Air Conditioning System
- Precautions
- System Description
- Specifications
- Instrument Panel Middle Face Duct Assembly - Removal and Installation
- Rear Face Duct Assembly I - Removal and Installation
- Rear Face Duct Assembly II - Removal and Installation
- Rear Face Duct Assembly III - Removal and Installation
- Left Floor Duct Assembly I - Removal and Installation
- Right Floor Duct Assembly I - Removal and Installation
- Floor Duct Assembly - Removal and Installation
- Evaporator Box Air Vent Transition Duct Assembly - Removal and Installation
- Air Humidity Sensor - Removal and Installation
- PM2.5 Quick Tester Assembly - Removal and Installation
- PM2.5 Quick Tester Assembly (Optional) - Removal and Installation
- Heat Pump HVAC Assembly - Removal and Installation
- Channel Temperature Sensor (Face) - Removal and Installation
- Channel Temperature Sensor (foot) - Removal and Installation
- Three-in-one Module - Removal and Installation
- Front Drain - Removal and Installation
- Return Duct Assembly - Removal and Installation
- Driver's Side Floor Duct - Removal and Installation
- Front Passenger's Side Floor Duct - Removal and Installation
- High Efficiency Filter - Removal and Installation
- Air Inlet Assembly - Removal and Installation
- Blower Speed Control Server - Removal and Installation
- Front Blower Assembly - Removal and Installation
- Inside and Outside Damper Control Motor - Removal and Installation
- Cooling and Heating Damper Control Motor - Removal and Installation
- Mode Damper Control Motor - Removal and Installation
- Low Voltage PTC Air Heater Assembly - Removal and Installation
- Interior Condenser Assembly - Removal and Installation
- Blower Case Assembly - Removal and Installation
- Evaporator Box Assembly - Removal and Installation
- Evaporator Assembly - Removal and Installation
- Integrated Thermal Management Module - Removal and Installation
- Wiring Harness Assembly of Integrated Module - Removal and Installation
- Integrated Thermal Management Module Bracket - Removal and Installation
- Integrated Thermal Management Module Bracket 1 - Removal and Installation
- Integrated Thermal Management Module Bracket 2 - Removal and Installation
- Electric Compressor Assembly - Removal and Installation
- Gas-liquid Separator Assembly - Removal and Installation
- Water Valve Actuating Motor - Removal and Installation
- Three-Way Valve Body Assembly - Removal and Installation
- Pressure Sensor - Removal and Installation
- Pressure & Temperature Sensor - Removal and Installation
- Plate Temperature Sensor - Removal and Installation
- Compressor Discharge Pipe Assembly 1 - Removal and Installation
- Compressor Discharge Pipe Assembly 2 - Removal and Installation
- Compressor Discharge Pipe Assembly 3 - Removal and Installation
- Compressor Discharge Pipe Assembly 5 - Removal and Installation
- Compressor Suction Pipe Assembly 1 - Removal and Installation
- Compressor Suction Pipe Assembly 2 - Removal and Installation
- Compressor Suction Pipe Assembly 3 - Removal and Installation
- Compressor Suction Pipe Assembly 4 - Removal and Installation
- Refrigeration Tube Assembly 1 - Removal and Installation
- Refrigeration Tube Assembly 3 - Removal and Installation
- Refrigeration Tube Assembly 4 - Removal and Installation
- Refrigeration Tube Assembly 5 - Removal and Installation
- Refrigeration Tube Assembly 6 - Removal and Installation
- Refrigeration Tube Assembly 7 - Removal and Installation
- Plate heat exchanger Inlet Pipe Assembly - Removal and Installation
- Plate heat exchanger Outlet Pipe Assembly - Removal and Installation
- Battery Cooling Plate Heat Exchanger Assembly - Removal and Installation
- Battery Cooling Plate Heat Exchanger Bracket Assembly - Removal and Installation
- Water Pipe Assembly in Motor Cooling Water Pump - Removal and Installation
- Outside Temperature Sensor - Removal and Installation
- Condenser Assembly - Removal and Installation
- Recovery and Filling of Refrigerant
- Switch and Wiring Harness
- Combination Switch
- Precautions
- System Description
- Combination Switch - Removal and Installation
- Low Voltage Wiring Harness
- Precautions
- System Description
- Specifications
- Front Compartment Wiring Harness - Removal and Installation
- Instrument Panel Wiring Harness - Removal and Installation
- Ceiling Wiring Harness - Removal and Installation
- Instrument Panel Wiring Harness I - Removal and Installation
- Floor Wiring Harness - Removal and Installation
- Left Front Door Wiring Harness - Removal and Installation
- Right Front Door Wiring Harness - Removal and Installation
- Left Rear Door Wiring Harness - Removal and Installation
- Right Rear Door Wiring Harness - Removal and Installation
- Tailgate Wiring Harness - Removal and Installation
- Front Bumper Line - Removal and Installation
- Rear Bumper Line - Removal and Installation
- Trailer Hitch Wire - Removal and Installation



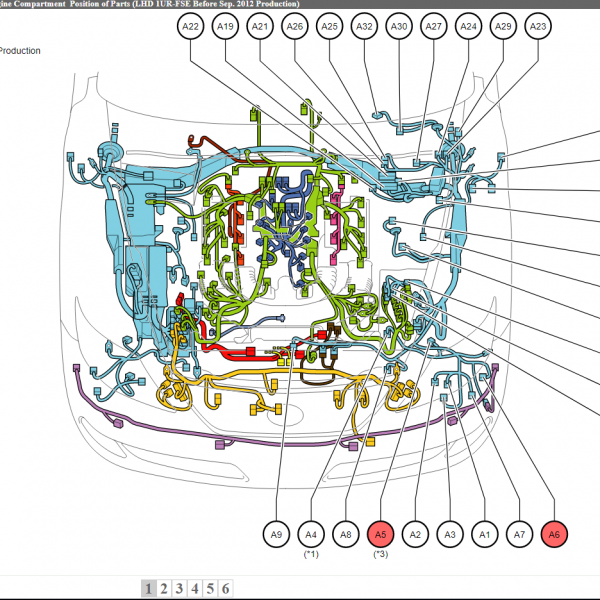


Reviews
Clear filtersThere are no reviews yet.